Advanced Amigurumi Patterns for Sale: Master Unique Crochet Designs People Actually Buy
You finished the sample. It looks cute in your hands, then you spot it, the head leans, the legs don't match, and the face feels "off" in photos.
That's the gap between making amigurumi and creating advanced amigurumi patterns for sale. Selling patterns means your design has to work for other crocheters, in different yarns, with different tension, and still come out looking like the listing photo.
This guide is the way we approach advanced designs when we want them to be repeatable, photo-ready, and worth paying for. No fluff, just the parts that actually change results.
What Makes an Amigurumi Pattern "Advanced" (and Sellable)
"Advanced" isn't just more stitches. The patterns that feel premium usually have three things: intentional shaping, controlled proportions, and details that look clean up close.
Here's what we look for when we're designing something meant to sell.
- Shaping that does more than make a ball. Think wedges, gussets, short rows, and placed increases that create cheekbones, shoulders, hips, or a beak that actually projects.
- Proportion control. Advanced designs often use different stitch heights (single crochet, half double crochet, double crochet) or different yarn weights on purpose, not by accident.
- Construction that hides "the weird parts." If you've ever battled a lumpy neck or a wobbly head, you already know construction is half the look.
- Repeatability. If it only works with your exact hook grip and your exact yarn brand, it's not ready for customers.
A quick reality check that saves time: complexity does not automatically equal value.
Buyers pay for patterns that give them a finished toy that looks like the photo. That means you can't treat the instructions like personal notes. You're writing a tiny product manual.
If you want a refresher on the building blocks that make this possible (yarn behavior, tight fabric, shaping tools), our skills breakdown helps: how to crochet advanced techniques without bulky results.
A Decision Framework: Choose These Advanced Features Based on the Toy
A lot of designers add "cool techniques" first, then try to force them into a character. Flip that. Start with what the toy needs to do visually.
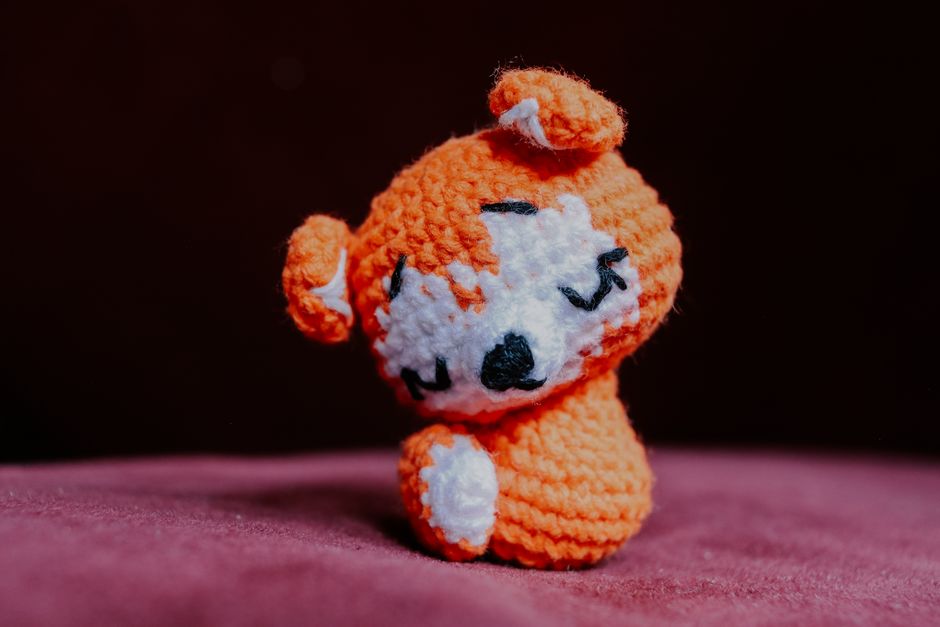
Use this choose-this-if framework to decide which advanced moves belong in your pattern.
Choose Sculpted Shaping If the Face or Silhouette Is the Selling Point
Pick sculpting tools when the toy's personality is mostly in the head or body outline.
Use these when you need structure:
- Strategic increase placement (not evenly spaced) to create a brow ridge, cheeks, or a snout base.
- Darts or wedges (fast changes in stitch count) to angle a forehead, chin, or belly.
- Surface crochet lines to "draw" muscle lines or seams without adding bulk.
Trade-off: sculpting adds more checkpoints and makes gauge differences show up more. You'll need clearer photos and measurement notes.
Choose Modular Pieces If the Design Needs Clean Edges
Modular construction (separate muzzle, eyelids, inner ears, hoof caps) is what gives that crisp, pro look.
Use modular pieces if:
- You want sharp color breaks without jagged stripes.
- You want raised details that still look neat in photos.
- You want the option to offer variations later (different expressions, different ears, different tails) without rewriting the whole pattern.
Trade-off: more pieces means more sewing. Buyers who hate sewing will avoid it unless you make assembly painless.
Choose Hybrid Fabric If You Need Both Stiffness and Draping
Some parts should be firm (head, feet), while others should bend (arms, tentacles, wings).
Tools that help:
- Different yarn weights in one project (example: worsted for the body, sport for small details).
- Different stitch heights (single crochet for structure, half double crochet for softer curves).
- Planned stuffing zones so joints don't balloon.
Trade-off: you must specify yarn substitutions clearly, or customers will get odd proportions.
A Worked Example: Designing a "Poseable Dragon" Pattern That Sells
Let's build a real design plan, the kind we'd write before we ever crochet the final sample. This is where "advanced" becomes intentional.
Step 1: Define the Buyer Promise in One Sentence
Example promise: "A dragon that can sit, hold a pose, and still looks cute from every angle."
That single promise tells you what matters: posture, balance, and silhouette.
Step 2: Choose Construction That Solves the Hard Part First
For a poseable dragon, the hard part is usually the neck and tail. If those flop, the whole thing reads messy.
A strong build plan:
- Make the head and neck as one piece (reduces wobble and avoids a lumpy join).
- Add a belly gusset (a shaped panel) so the body sits instead of tipping.
- Use a segmented tail (small count changes) so it curves without kinking.
This is also where you decide if you'll allow optional armature (wire inside). If you do, include strong safety notes and make it optional. Many sellers avoid wire in toys meant for kids.
Step 3: Engineer the "Photo Details"
This is the part most patterns skip, then wonder why their listing looks flat.
For the dragon face:
- Inset eyes (eyes placed deeper by shaping the head, not just sewing on felt) make the expression look expensive.
- Separate eyelids let buyers change the mood, sleepy, angry, happy, without changing the head.
- A two-piece muzzle (top snout plus lower jaw) gives a real profile.
For wings:
- Use stiffer stitches near the base so the wing doesn't droop.
- Add surface crochet "veins" to make the wing read clearly in photos.
Step 4: Write the Pattern so Other People Succeed
An advanced pattern lives or dies on clarity. We include:
- A stitch count at the end of every round.
- "Landmarks" like "place marker at center back" so symmetry stays true.
- Assembly order that prevents trapped sewing.
One non-obvious tip that saves your customers: include a "tension warning" line where it matters most.
Example: "If your head looks pointy at the top, go up 0.5 mm in hook size for rounds 1 to 6 only." That one line reduces bad reviews.
If your focus is stuffed animals specifically, the troubleshooting ideas in crocheting tips for unique stuffed animals with complex patterns pair well with this design workflow.
Getting Your Pattern Ready to Sell (Without Angry Messages)
The difference between a design you love and a pattern that sells is testing and packaging.

Pattern Testing: What to Test for in Advanced Amigurumi
Testing is not just "does it work once." It's "does it work for a normal crocheter."
Ask testers to try at least one variable:
- Different yarn brand (same weight)
- Different hook size
- Different eye type (safety eyes vs embroidered)
What you want to learn:
- Where people lose track (usually in shaping rounds)
- Where stitch counts don't match (a sign your instructions are missing a step)
- Where the toy looks different than your photos (a sign you need a landmark or measurement)
Photos and Listing Copy: Sell the Shape, Not the Hype
Advanced amigurumi sells visually. Your photos should prove three things: the silhouette, the details, and the scale.
A simple shot list:
- Front, side, and back views (shows shaping)
- One close-up of the face detail (shows quality)
- One photo next to a common object (shows scale)
In the description, be blunt about what makes it advanced:
- Sewing level (light, medium, heavy)
- Any special techniques (surface crochet, color changes, gussets)
- Required materials (eyes, felt, pipe cleaners, etc.)
This reduces refunds and keeps reviews focused on the fun parts.
Pricing and Value: What Buyers Actually Pay For
Pricing is personal, but value is consistent. People pay more when you give them:
- Multiple expressions or accessories (same base pattern, more options)
- Clear diagrams for tricky steps
- A clean assembly flow
If you plan to offer advanced amigurumi patterns for sale long-term, build "variation hooks" into the design from day one. Example: interchangeable snouts, two ear shapes, three tail tips. Those become future add-ons without reworking the whole toy.
Common Advanced Amigurumi Problems (and How to Prevent Them)
These are the issues we see most when a pattern is almost ready, but not quite sellable.
The Head Wobbles or Tilts in Photos
This is usually construction, not stuffing.
Fix options:
- Make the neck wider where it joins the body.
- Add a flat "support disc" inside the body top (a crocheted circle) before stuffing.
- Join head-to-body across more rounds (longer join seam).
Symmetry Drifts (Ears, Eyes, Legs Don't Match)
Advanced patterns need landmarks, not vibes.
- Mark center front and center back early.
- Write placement like "eyes between rounds 10 and 11, 8 stitches apart" instead of "place eyes evenly."
- Use a "pin first, sew second" assembly step in the pattern.
Color Changes Look Jagged
Clean color work often decides if a design looks handmade in a good way or a messy way.
- Move the color change to the last yarn-over of the previous stitch.
- Hide jogs (the step between rounds) on the back or under an accessory.
- Consider modular parts for sharp edges (inner ears, belly panel).
Closing: Build One Premium Base, Then Sell Variations
The fastest path to better sales is not cranking out more designs. It's making one advanced base pattern that comes out right for other people, then releasing variations that reuse the same structure.
If you want help picking the best place to list your patterns and what shoppers look for, start with where to buy crochet patterns and what sells there.
If you're building your next release right now, keep it simple: solve one hard problem (shape, pose, or clean details), test it like a product, then package it like you want zero confused messages. That's how advanced patterns earn their price.