
Unique Crochet Stuffed Animal Designs: Complex Patterns to Sell (Without Copying Everyone Else)
The fastest way to lose sales is to make a "unique" crochet plush that looks like everyone else's bear with different eyes.
If you're searching for unique crochet stuffed animal designs, you're probably trying to do two hard things at once: build a toy people instantly recognize as yours, and pick a complex pattern that's still worth the time to make and sell.
We sell crochet patterns and we've tested basically every construction trick under the sun. This guide is a comparison of the design paths that actually lead to sellable plush, plus a worked example you can copy as a process.
Choose Your "Uniqueness Lever" Before You Choose a Pattern
Complexity isn't the same as uniqueness. A toy can take 12 hours and still look generic.
What sells is a clear, repeatable "signature." Pick one main lever, then add complexity where it supports that lever.
Here are four levers that reliably create unique crochet stuffed animal designs, with the trade-offs you'll feel while making and selling.
- Silhouette-first (shape does the talking): Think long limbs, big head-to-body ratio, unusual posture (sitting sloth, curled shrimp, floppy-eared bat).
- Texture-first (touch is the hook): Bobble stitch fur, loop stitch manes, ridged "scales," faux feathers.
- Colorwork-first (patterned skin/fur): Spots, stripes, gradients, tapestry (color carried inside).
- Character-first (tiny details): Removable accessories, expressive eyelids, embroidered "smirk," asymmetry.
If you're selling finished plush, silhouette-first and character-first usually read best in listings. If you're selling patterns, texture-first and colorwork-first often feel "worth paying for" because makers see the technique.
Transition: once you know your lever, you can judge whether a complex pattern is profitable or just complicated.
Complex Pattern vs. Complicated Pattern: a Quick Decision Framework
A complex pattern can be smooth to make and easy to repeat. A complicated one fights you the whole way.

Use this simple A/B/C choice before you commit to a new design.
Option a: Choose Sculpted Shapes If Your Buyers Want "Wow" Photos
Pick sculpted shapes when the product photo needs to stop the scroll.
Look for patterns with:
- Clear shaping sections (not constant tiny changes every round)
- Symmetry you can mirror (left/right limbs)
- Seam placement planned from the start (hidden under arms, behind ears)
Avoid "shape soup," where every round changes in a different way. It's impressive, but it's hard to reproduce consistently. Consistency matters when you're selling.
Option B: Choose Modular Builds If You Need Speed and Variations
Modular means head, body, limbs, ears, tail, and extras are separate parts you assemble.
This is the best path if you want a product line. You can reuse parts across animals.
Examples of modular variation that still looks original:
- Same body, swap head and tail (fox, cat, raccoon)
- Same head, swap ears and muzzle (bear, koala, panda)
- Same base animal, swap accessories (chef hat, scarf, backpack)
The trade-off is sewing. If you hate assembly, this path can feel endless.
Option C: Choose Technique-Forward Patterns If You Sell Patterns (Not Only Plush)
Technique-forward patterns are the ones other crocheters buy because they learn something.
Good "value techniques" for patterns include:
- Clean color changes that don't spiral out of place
- Surface crochet (stitching on top) for markings
- Short rows for cheeks, bellies, or curved backs
- Textured stitches used in small doses (mane, tummy, spikes)
If your goal is pattern sales, include a technique that's easy to show in listing photos. Makers buy with their eyes.
If you want more help picking an approach, our deeper breakdown on construction styles is here: how to crochet complex designs for stuffed animals.
Transition: frameworks are nice, but you still need a process that turns "idea" into a sellable plush.
Worked Example: Designing a Sellable Dragon That Isn't "Just Another Dragon"
Dragons are everywhere, so they're a perfect test. We'll build uniqueness using one lever (silhouette-first), then add controlled complexity.

Step 1: Define One Signature Feature
Signature: a curled "seahorse tail" dragon body.
That one choice changes the whole silhouette, even if the face is simple.
Step 2: Pick a Construction That Supports It
Use a single-piece body-to-tail tube so the curve looks intentional.
- Start at the snout, work to head, then body, then tail
- Add increases early for belly, then decreases to taper
- Use short rows near the tail to force a curl (like shaping a heel in a sock)
This is complex, but it's predictable. You're shaping in zones, not improvising every round.
Step 3: Add "Premium" Details That Don't Explode Your Time
Choose two detail types, not seven.
- Spines: make 7 to 9 small triangles, seam them down the back
- Wings: simple wing with a ridged edge (single crochet edge + chain spaces)
Skip hyper-textured fur and complex colorwork on the same toy. You'll add time without adding clarity.
Step 4: Make It Repeatable (This Is Where Profit Hides)
Before you list it, test repeatability:
- Make a mini version at 50 to 60 percent size.
- Note where stuffing gets lumpy (usually neck and tail).
- Adjust stitch choice or stuffing method.
A practical trick we use: stuff in stages and shape with a blunt tool (like the end of a crochet hook) to push filling into narrow areas.
Step 5: Create a Product Line From One Base
Same pattern base, three "skins":
- Moss dragon (greens, tiny leaf appliqué)
- Storm dragon (gray body, white belly, embroidered lightning scar)
- Candy dragon (pastels, sprinkle-like French knots)
Now you're not competing on "dragon," you're competing on your dragon.
Transition: even a great design can fail if the yarn choice makes it look cheap or fall apart.
Yarn, Finishing, and Safety: What Actually Changes the Perceived Value
Shoppers can't feel your stitches through a screen, so finishing becomes your quality signal.
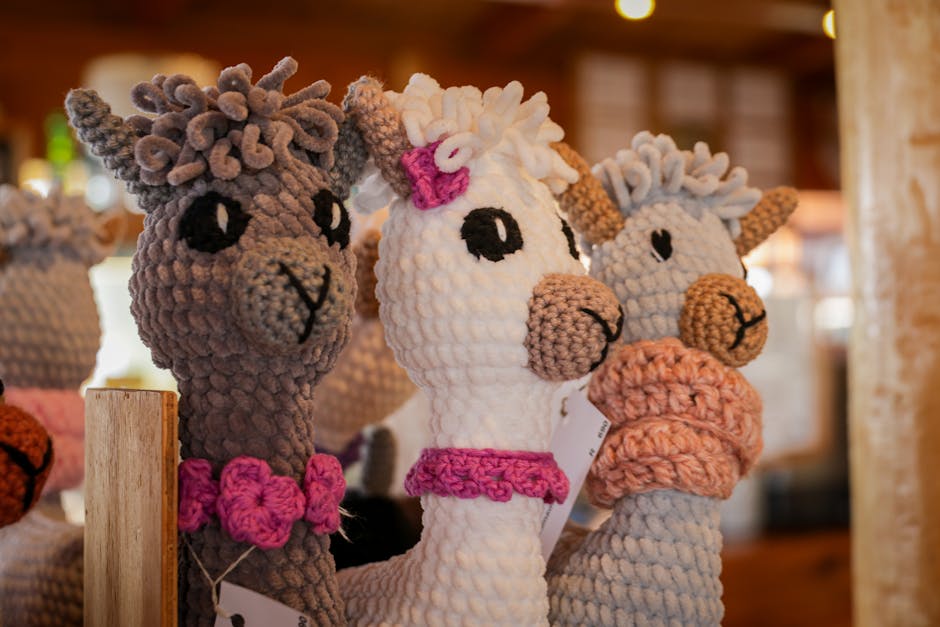
Yarn Choices That Help Toys Look "Store-Quality"
In our experience, these guidelines keep the plush looking clean:
- Use a yarn that holds stitch definition (you want crisp shaping).
- Avoid super-shedding fuzzy yarn for detailed faces.
- Match hook size to get tight fabric (no stuffing showing).
If you want a full materials checklist, we keep one updated here: crochet supplies and materials for better plush results.
Finishing Details That Buyers Notice (Even If They Can't Name Them)
- Eye placement symmetry: mark first, sew second. Don't "eyeball" it.
- Invisible decreases: reduces little holes at shaping points.
- Clean joins: use a consistent method for changing colors and attaching parts.
Safety Caveat If You Sell Finished Plush
If your plush is for kids, small parts matter. Safety eyes, buttons, and tiny accessories can be choking hazards.
In the U.S., children's products have specific safety rules, and small parts are a big part of that. If you plan to market to young children, read the official overview from the U.S. Consumer Product Safety Commission: CPSC guidance for small businesses making children's products.
If you're not sure, it's safer to market your items as "decor" or "collector plush," and use embroidered features.
Transition: now you've got a design worth making. Next is pricing it so "complex" doesn't turn into "underpaid."
Pricing Complex Plush and Patterns Without Underselling Yourself
Complex patterns cost you time in three places: stitching, assembly, and fixing mistakes. Pricing should reflect the real time, not just the crochet time.
For Finished Stuffed Animals: Price the Process, Not the Materials
A practical way to think about it:
- Track how long one full toy takes, including sewing and weaving ends.
- Add time for photography, listing, and packing.
- Decide on an hourly rate you can live with.
If that price feels "too high for your market," don't race to the bottom. Reduce complexity in the slowest area.
Common swaps that keep the look but cut time:
- Fewer sewn-on spikes, switch to surface crochet ridge
- Simplify limbs (tube arms) and push uniqueness into silhouette or face
- Replace complicated colorwork with one bold marking (eye patch, belly stripe)
For Patterns: Charge for Clarity and Confidence
Pattern buyers pay for:
- Clean instructions that don't require guessing
- Helpful photos at tricky steps
- A design they haven't seen 200 times
If your pattern is complex, include structure that keeps makers moving:
- Stitch counts at the end of each round
- Notes like "stuff firmly now" at the right time
- A "customize it" section (ears, tails, expressions)
We focus on intricate toy patterns, so if you want inspiration for what counts as "complex but doable," start here: how to crochet unique stuffed toys with intricate patterns.
Build a "Signature Series" so You're Not Starting From Zero Every Time
The easiest way to keep making unique crochet stuffed animal designs is to stop reinventing the whole animal.
Pick a base style, then build a series around it:
- One head shape, many snouts
- One body, many tails
- One wing pattern, many creatures
Your series becomes recognizable, and your production gets faster.
If you want, browse our pattern shop at https://artncraftartncraft.art and look for patterns that share a construction style. That's not an accident. It's how you build a brand and still enjoy the making.
If you're ready to create your next best-seller, choose one uniqueness lever, sketch three variants, and commit to one repeatable build. The "unique" part should be obvious in the first photo, and the "complex" part should make the maker feel proud, not stuck.