
How to Crochet Unique Clothing: Create and Sell Complex Designs
"Unique crochet clothing isn't about a fancy stitch. It's about control, fit, and clean finishing." That's the standard we use in our studio, because the difference between a cute top and a sellable garment is usually the unglamorous parts.
If you're searching for how to crochet unique clothing, you probably have one of these problems: your ideas look amazing in your head but collapse in real yarn, your fit is inconsistent, or you don't know how to price and sell something that took real brainpower. This guide is built to fix those exact issues, with a worked example you can copy and adapt.
How to Crochet Unique Clothing Without Guessing
Unique clothing starts with a clear "design brief" (a short plan) before you ever chain.
Pick 3 decisions and lock them in:
- Silhouette (shape): fitted, boxy, oversized, cropped, longline
- Structure method: top-down yoke, bottom-up panels, seamless raglan, joined motifs
- Signature detail: texture panel, colorwork, shaping line, unusual sleeve, edge finish
Here's the rule we live by: make one part complex, keep the rest calm.
If everything is complex, it looks messy and it's hard to size. If everything is simple, it's harder to stand out.
Choose Your Construction Style (Decision Framework)
Most complex garments fall into one of these builds. Choose based on what you care about most.
- Top-down raglan (seamless): Choose this if you want easy try-ons while you work, and flexible sizing.
- Panel build (front/back/sleeves): Choose this if you want crisp edges, graphic stitch work, and easier grading (making multiple sizes).
- Motif join (granny, lace blocks): Choose this if you want a bold look fast, and you don't mind blocking (wet shaping) and seaming.
Our opinion: if you plan to sell finished clothing, panel builds are underrated. Clean seams make garments look "store-bought" in the best way.
The Non-Obvious Part: Fit Starts with Fabric, Not Math
Most "fit problems" are fabric problems.

A stitch can be perfect for a blanket and awful for a sweater. Clothing needs drape (how it hangs), recovery (how it bounces back), and stability (not stretching out forever).
Before you pick a stitch pattern, pick your fabric behavior:
- Crisp and structured: great for jackets, vests, corset-style tops. Use tighter stitches, smaller hook, firm fibers.
- Drapey and fluid: great for cardigans, wide-leg pants overlays, flowy tops. Use taller stitches, lace, softer fibers.
- Stretchy and body-hugging: great for fitted tees and ribbing. Use ribbing methods and fibers with spring.
If you want help picking yarn that behaves the way you want, we go deep in our guide to yarn choices and how they affect finished fabric.
Swatch Like a Designer (Not Like a Homework Assignment)
A real garment swatch answers four questions:
- What's my stitch gauge after blocking?
- Does it grow after hanging for a day?
- Does it feel good on skin?
- Does it look expensive up close?
Make a swatch at least 6 in x 6 in.
Block it (wash or steam the way you'll treat the final item), then hang it with a few clothespins overnight. If it grows a lot, you need more structure (smaller hook, different stitch, or different yarn).
Worked Example: a Sellable Statement Vest with a "Wow" Back Panel
Let's design a complex-looking piece that's actually manageable: a cropped vest with a fitted rib edge, clean armholes, and a bold textured back panel.
Step 1: Define the Brief
- Silhouette: slightly cropped, fitted at hem, relaxed at chest
- Construction: panel build (front-left, front-right, back)
- Signature detail: one large textured panel only on the back
This keeps your complexity in one spot, which helps sizing and keeps your time predictable.
Step 2: Pick Stitches with Jobs
Assign a job to each stitch area.
- Hem and edges (needs snap-back): ribbing made with back-loop-only single crochet
- Body (needs stability): half double crochet or moss stitch
- Back panel (needs drama): a raised texture like overlay stitches, cables, or a dense lattice
Keep the body stitch simple so the textured back becomes the focal point.
Step 3: Build the Pattern Pieces (the Simple Way)
- Measure target bust and decide ease (extra room). For a vest, we often like a little ease so it layers.
- Make ribbing strip to fit the hem width, then join to form the base.
- Work up in body stitch until you hit armhole height.
- Split into panels for the two fronts and back, then shape armholes with small step-downs.
- Add neckline shaping last, using gradual decreases so it lays flat.
A key pro move: armholes and necklines look cleaner if you finish them with a consistent edging (like single crochet plus slip stitch seam) after blocking.
Step 4: Make It "Unique" Without Making It Fragile
Uniqueness that sells is wearable uniqueness.
Add one of these upgrades:
- Hidden structure: slip-stitch reinforcement along shoulder seams so it doesn't stretch
- Smart placement: put texture where it won't rub under arms
- Clean hardware option: add closures (buttons, ties) but stabilize the button band with tighter stitches
If you sell a finished piece, you're selling repeatability. A design that survives friction, weight, and washing is easier to stand behind.
Turning Complex Designs Into Products You Can Actually Sell
Selling crochet clothing has two sides: the item (or pattern) and the buyer's expectations.

Sell Finished Clothing vs Sell Patterns (Trade-Offs)
Choose based on what you enjoy and what you can sustain.
- Finished clothing: Higher labor, fewer sales per design, strong "one-of-one" appeal. Best if you love making and finishing.
- Patterns: Upfront design work, then scalable. Best if you like writing, testing, and teaching.
We sell patterns, so we think in repeatable steps. Even if you sell finished pieces, building a "pattern-like plan" makes your work faster and your results consistent.
Price Complex Pieces Without Regret
We can't set your exact price, but we can give a pricing reality check.
Complexity often hides in:
- shaping and re-trying on
- seaming and weaving ends
- edging, blocking, and finishing
- photo time and listing time
If you don't account for finishing, you'll resent the sale.
A practical approach: track your time for one prototype, then decide if the item is still worth making. If not, convert it into a pattern (or simplify the design and keep the signature detail).
Make Sizing Less Painful
Clothing gets hard when you add sizes.
Two strategies that reduce headaches:
- Modular sizing: keep the back panel consistent and adjust width mostly in the front panels.
- Adjustable features: ties, lacing, flexible ribbing, or button placement that allows a little fit range.
Also, write down your "grading rules" (how much you add per size). Consistency matters more than perfection.
If you love complex builds, you'll enjoy advanced crochet pattern ideas and technique comparisons for more ways to add wow without breaking the garment.
Common Mistakes We See (and How to Avoid Them)
Most "this doesn't look like the photo" problems come from a few repeat offenders.
- Skipping blocking: Clothing nearly always needs it. Texture pops and edges straighten.
- Over-designing: Too many focal points makes the garment look busy and harder to style.
- Ignoring weight: Heavy yarn plus long garments equals stretching. Reinforce shoulders and consider lining or tighter stitch choices.
- No edge plan: Raw edges can curl. Decide early how you'll finish neck, hem, and armholes.
A good unique garment still has boring, professional bones.
FAQ
Do I Need to Know Advanced Stitches to Crochet Unique Clothing?
No. A simple stitch can look high-end with great fit and finishing. Use one advanced feature, like a textured panel or shaped neckline, and keep the rest clean.
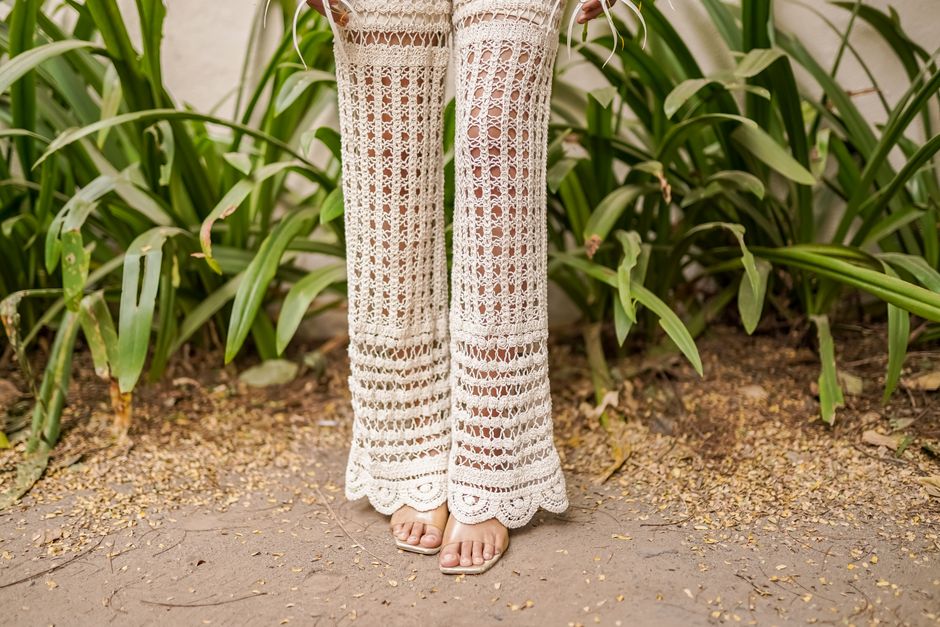
What's the Fastest Way to Make a Design Look "Designer"?
Use consistent edges, block the garment, and make your seams neat. Also limit your palette. One main color with one accent often looks more intentional.
Can I Sell Items Made From My Own Patterns?
Yes, if you wrote the pattern, you control the terms. If you use someone else's pattern, check their license terms first.
Make One "Hero Feature," Then Build the Garment Around It
If you take one thing from this guide, take this: pick your hero feature first (texture, shape, or colorwork), then choose a construction method that supports it.
If you want to skip the trial-and-error phase, check out our patterns at https://artncraftartncraft.art. We build designs the way we build garments, clean structure first, then the fun parts.