
How to Crochet Stuffed Animal Patterns: Master Complex, Unique Designs to Sell
Your cute plushie can be perfectly stitched and still not sell, because it looks like every other bunny on the table. The jump from "nice" to "bookmark-worthy" happens when you control shape, details, and finish like a designer.
This guide shows how to crochet stuffed animal patterns that feel truly unique, including a worked example you can copy, plus a simple framework for choosing complexity that sells (without making a project that takes forever).
How to Crochet Stuffed Animal Patterns That Look High-End (Not Just Hard)
Complex crochet isn't only about using more stitches. It's about building a clean silhouette, adding details that read from across the room, and finishing so the toy looks intentional.
Here's the core build we use for most sellable plush designs, even the weird ones.
Start with the Silhouette, Not the Stitches
If the outline is strong, the pattern sells even in plain yarn. If the outline is mushy, no amount of embroidery saves it.
Pick one "recognizable from 10 feet" feature, then build everything else around it.
- A long snout (aardvark, dragon)
- A tall head shape (axolotl, mushroom creature)
- Oversized ears or horns (jackalope, ram)
- A dramatic tail (fox, sea monster)
Then decide what kind of body you're building.
- Round and squat (cute, fast, beginner-friendly)
- Tall and thin (more character, needs structure)
- Limb-heavy (poses well, more sewing)
Use Shaping on Purpose (Increase, Decrease, and Placement)
Most amigurumi (crocheted stuffed toys) use single crochet in the round. The "complex" look comes from where you place increases and decreases, not from switching to fancy stitch patterns.
A practical rule:
- Increases placed in one zone create bulges (cheeks, thighs, brow ridges).
- Decreases stacked in one zone create points and angles (snouts, chins, tail tips).
If you spread increases evenly every round, you get a ball. That's fine, but it won't look custom.
Add One Signature Detail, Then Stop
Details are where time explodes. The trick is choosing one detail with high visual payoff.
Good "signature details" for items you want to sell:
- A two-layer eye (white + iris + tiny highlight)
- A contrast belly panel (crochet-on appliqué or colorwork)
- Textured mane or spines (surface crochet, loop stitch, or brushed yarn)
- A wired tail pose (only if you're clear about safety and audience)
Pick one. Two is sometimes fine. Three usually turns into a project you can't price fairly.
Transitioning from technique to product is the next step, because the best pattern on earth doesn't help if it's miserable to make twice.
A Complexity Framework for Patterns You Can Actually Sell
We design "sellable complex" patterns by choosing complexity that customers notice, but makers can repeat.

Use this decision framework before you commit.
Choose Your Complexity Type (Visual, Build, or Finish)
Choose visual complexity if you want the plush to stand out in photos.
- Color blocking
- Bold shapes (ears, horns, snouts)
- Big eye style
Choose build complexity if you want a pattern that feels advanced and premium.
- Multiple parts with clean joins
- Articulated limbs
- Shaping that creates angles, not blobs
Choose finish complexity if you want "wow" without rewriting the whole pattern.
- Clean facial embroidery
- Needle-sculpting (pulling stitches to shape cheeks or eye sockets)
- Surface crochet lines for definition
For selling finished toys, finish complexity often gives the best return. For selling patterns, build complexity often feels more "worth it" to the buyer.
The Repeatability Checklist (Before You Fall in Love)
Run your idea through this list. If you get too many "yes" answers, simplify.
- Will it require more than 6 separate sewn pieces?
- Does it need exact tension changes to work?
- Are there more than 3 color changes per round?
- Does it rely on fragile parts (tiny fingers, thin legs) that distort when stuffed?
- Will a small mistake force you to rip back more than 10 rounds?
If you want a pattern that other crocheters will recommend, clarity and repeatability matter as much as cuteness.
If you want a deeper roadmap for designing items specifically for buyers, our guide on crocheting unique patterns for sale pairs well with this article.
Worked Example: a "Moon Cat" Pattern Concept Built for Sales
Here's a concrete example of how we take one idea and turn it into a complex-looking stuffed animal that's still repeatable.
Concept: a cat plush with a crescent moon forehead mark, chunky cheeks, and a curled tail that frames the body.
Step 1: Plan the Parts (Keep It Under Control)
We choose five parts total:
- Head (with cheek shaping)
- Body (simple oval)
- 2 ears (identical)
- Tail (curved)
That's enough to look designed, but not so many pieces that assembly kills your profit.
Step 2: Build Head Shaping with "Zones"
Instead of even increases, we create cheek zones.
- Work the head in the round.
- Place extra increases on the left and right "cheek" areas for 3 to 4 rounds.
- Keep the top of the head smoother by using fewer increases there.
Result: the face reads like a cat, not a ball with ears.
Step 3: Add the Signature Detail (Crescent Mark)
We want a crisp crescent that photographs well. Two good options:
- Crochet a small crescent appliqué and sew it on (fast, consistent).
- Use surface crochet (stitching on top of finished fabric) to draw the crescent line (more skill, very clean).
For a product line, appliqué is easier to keep consistent across many toys.
Step 4: Engineer the Tail so It Always Curls
A tail that flops can ruin the pose. To make a reliable curl:
- Crochet the tail as a tapered tube.
- Add decreases faster near the tip to create a point.
- Before closing, stuff lightly, leaving the last third softer.
- Sew the tail on with a slight twist, so the seam forces a curve.
If you want an even stronger curl, you can stitch the tail to the body at one extra anchor point (like a hidden tack stitch). That keeps the "frame" shape in photos.
Step 5: Finishing Choices That Read as Premium
These finishing moves look advanced, but don't add much time.
- Slightly sink the safety eyes (or embroidered eyes) with a tight stitch around the eye area.
- Add a tiny mouth with one strand of embroidery floss, not yarn.
- Needle-sculpt the cheeks with two small tacking stitches.
That's the difference between "cute craft fair cat" and "collector plush cat."
Materials Choices That Make Complex Designs Easier
Yarn choice can make a difficult pattern feel smooth, or make a simple pattern look messy.

For complex stuffed animals, we usually pick yarn that gives clean stitch definition. That makes shaping and details show up.
Common trade-offs:
- Smooth cotton or cotton blends show every stitch (great for detail, less forgiving).
- Acrylic is forgiving and budget-friendly (good for volume, can look fuzzier).
- Chenille feels amazing but hides stitches (fast plush, harder to keep symmetry).
Hook size matters too. A tighter fabric holds stuffing and keeps angles crisp.
If you want a practical breakdown of yarn types for plush, this guide helps you match yarn to the look you want: best yarn types for crocheting standout plush designs.
Safety and Selling Note (Quick but Important)
If you sell finished toys, be careful with small parts.
- Safety eyes can be a choking hazard for small kids.
- Buttons and beads are risky on toys meant for children.
Many makers offer "kid-safe embroidered eyes" as an option. If you're selling at markets, label your items clearly and consider who your buyer is.
Common "Complex" Mistakes That Make Toys Harder to Sell
Most problems show up in photos first. Fix these and your plush instantly looks more pro.
Over-Detailing the Face
Too many features compete. The toy reads as cluttered.
Pick two:
- Eyes
- Nose
- Mouth
- Cheek marks
- Brow line
Let the silhouette and one signature detail do the heavy lifting.
Stiff Parts That Don't Match the Body
If the body is soft and the limbs are rock-hard, the toy feels odd in the hand.
Try stuffing limbs lighter, and use firmer stuffing only where structure matters (like a neck that needs to hold a big head).
Sewing That Changes the Expression
You can crochet perfect parts and still end up with a "sad" face if the eyes aren't level.
A simple fix: pin everything in place, step back, take a photo, then adjust. Photos show asymmetry better than your eyes in the moment.
Turn One Design Into a Small Product Line
The easiest way to sell more is not to invent ten new patterns. It's to make one strong base pattern and release variations.
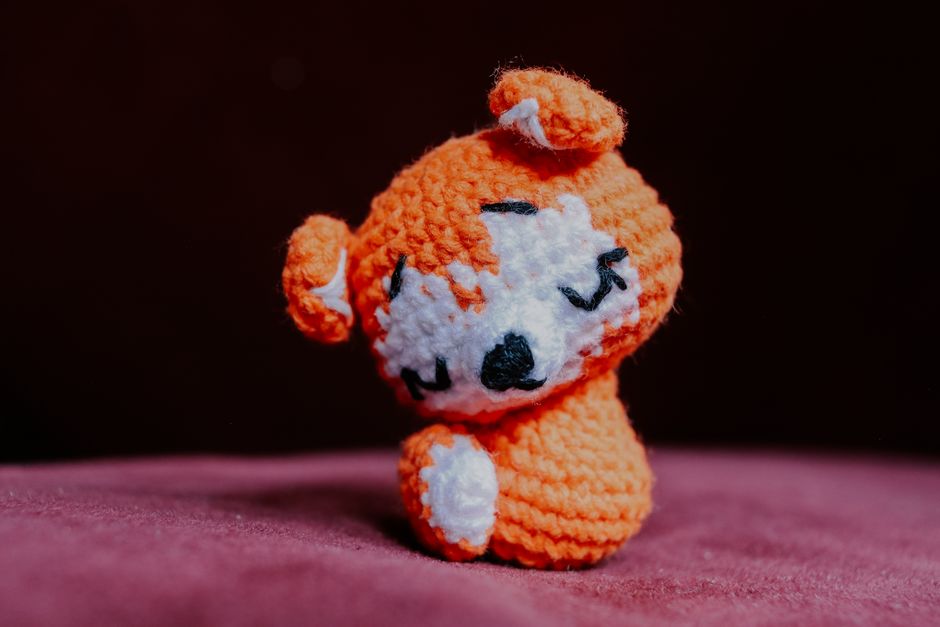
For the "Moon Cat" example, variations that feel fresh without a full redesign:
- Swap ears (bat ears, bunny ears, folded kitten ears)
- Change the tail (straight, double-curled, fluffy tip)
- Add a hood or tiny cape as a removable accessory
- Change color placement (belly patch, paws, face mask)
This approach also helps if you sell patterns. Buyers love a "series" because it feels collectible.
If you want more advanced build ideas that still make sense for selling, our case-based technique guide is here: advanced crochet techniques that work for items you sell.
Your Next Step: Design One "Signature Animal" and Test It
Pick one creature concept with a strong silhouette, choose one signature detail, and keep the parts list reasonable. Make a prototype, take photos, and note where the time went.
That's how you grow into complex patterns that sell, without building a pile of half-finished "ambitious" plushies.
If you want, grab one of our patterns from https://artncraftartncraft.art and use it as a base reference for structure, shaping, and finish, then remix it into your own signature style.