Crochet Patterns for Stuffed Animals: Crafting Advanced Designs That Look Alive
What makes a plushie stop looking "cute" and start looking real? Crochet Patterns for Stuffed Animals can do that, but only if your pattern builds smart shapes, clean details, and solid structure. This guide shows you how to level up from simple tubes and spheres into advanced stuffed animals with better faces, smoother color changes, stronger seams, and poses that hold.
You'll get a comparison-style look at what "basic" patterns do versus what "advanced" patterns do, plus practical steps you can apply right away. If you sell patterns or finished toys, these upgrades also help your work stand out in photos and feel more professional in hand.
Basic vs Advanced Pattern Planning (and Why It Changes Everything)
Basic stuffed animal patterns usually start with a simple idea: make a ball for the head, a bigger ball for the body, then attach limbs. That works, and it's a fun place to begin. Advanced planning flips the approach. You start with the animal's silhouette (overall outline) and decide what shapes you need to match it.
Advanced Crochet Patterns for Stuffed Animals also plan for "readability" from far away. A fox should look like a fox in a tiny thumbnail photo, not only when someone holds it up close. That means you plan ear angle, snout length, body taper, and tail placement before you pick stitch counts.
Here's a simple comparison checklist you can use while designing:
- Basic planning: separate parts that are mostly round or tube-shaped
- Advanced planning: parts that taper, curve, and flow into each other
- Basic planning: face details added at the end with embroidery only
- Advanced planning: face structure built in (eye sockets, muzzle, brow)
- Basic planning: "close enough" proportions
- Advanced planning: measured proportions that match a reference photo
If you want a bridge between the two, spend time on skill drills before drafting. The tiny upgrades matter. Learn more about clean shaping and specialty stitches in advanced crochet techniques.
Shaping That Looks Sculpted: Increases, Decreases, and Curves
A lot of toy makers can increase and decrease, but advanced shaping is about where you place them. Two patterns can use the same number of stitches and still look totally different. The difference is distribution (how you spread increases and decreases around the round) and pacing (how quickly you change the stitch count).
Basic patterns often stack changes in obvious places, which can make corners or flat spots. Advanced Crochet Patterns for Stuffed Animals hide shaping in ways that create cheeks, shoulders, hips, and bellies. Think of it like clay. You're sculpting with stitches.
Use this "basic vs advanced" shaping mindset:
- Basic: increase evenly every round without considering anatomy
- Advanced: increase more on the "front" to create a belly or muzzle
- Basic: fast decreases to close quickly
- Advanced: slower decreases to keep a rounded, natural curve
- Basic: head is a sphere
- Advanced: head has a jawline, brow ridge, or snout transition
Here's a reliable step-by-step way to design a curved form (like a snout or haunch) without guesswork:
- Sketch the side profile and mark the widest point
- Decide how many rounds you want from start to widest point
- Add increases gradually to reach that width
- Hold the piece in your hand every few rounds and pinch-shape it
- Mirror the curve with gradual decreases, not sudden closures
For smoother shaping, many crocheters use an "invisible decrease" (a decrease that reduces gaps). That reduces the "holey" look around tight curves. Crochet stitch anatomy and tension basics are also well documented in Craft Yarn Council standards, which helps when you're writing patterns that other people can follow.
Clean Colorwork and Texture: Stripes, Spots, Fur, and Feathers
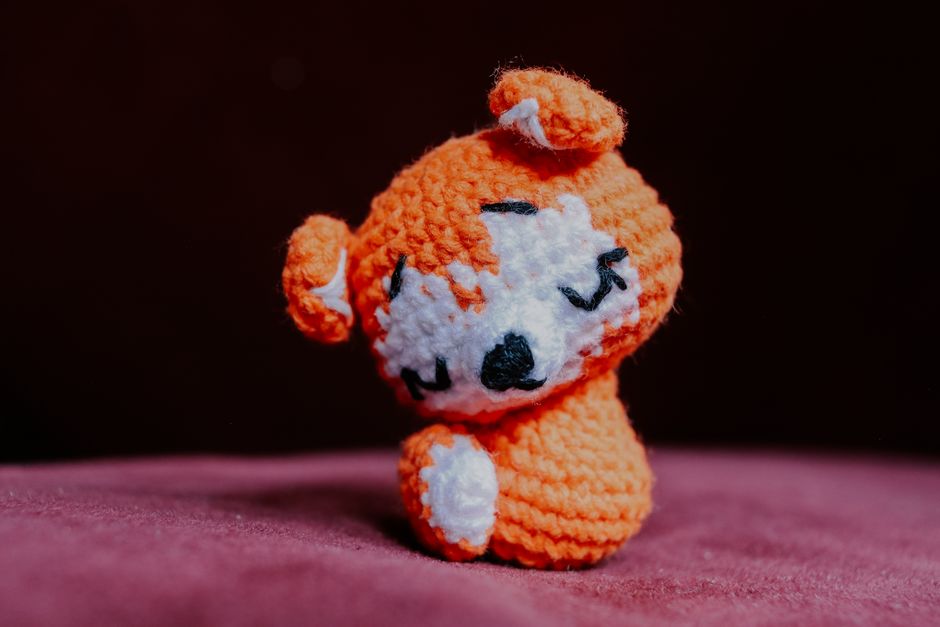
Color changes and texture are where stuffed animals can look store-bought or handmade in the best way. Basic patterns often use simple stripes, and that's fine for bees, cats, or dinosaurs. Advanced Crochet Patterns for Stuffed Animals go further with planned markings, smoother transitions, and intentional texture.
The biggest difference is control. Instead of "change color whenever you feel like it," you place color changes where they support the anatomy. A raccoon mask sits around the eyes. A fox belly patch lands under the chin and widens near the chest. A leopard's spots wrap around the body and fade smaller toward limbs.
Try these upgrades, with the "basic vs advanced" framing:
- Basic: color change at the start of a round
- Advanced: color change exactly where the marking should sit
- Basic: tie knots and hope they stay hidden
- Advanced: carry yarn in a planned path or use clean joins
- Basic: one texture everywhere
- Advanced: texture only where it makes sense (mane, belly fluff, tail tip)
If you want faux fur (a fluffy look), you can use loop stitch (stitches that pull up loops) or brush-out yarn carefully. Safety matters here, especially for kids' toys. Brushing can shed fibers depending on yarn type.
For toy safety and material choices, official guidance helps you make good calls. The U.S. Consumer Product Safety Commission has resources about children's product safety, including small parts risks and general safety reminders. Start with CPSC and always consider age grading (what age the toy is meant for).
A practical way to keep colorwork neat is to write it into your pattern as "color-change stitches." For example: "sc 10 in A, sc 6 changing to B on the last yarn over, sc 12 in B." That makes your results repeatable, which is what turns a personal project into a sellable pattern.
Faces That Get Gasps: Eye Placement, Muzzles, and Expressions
The face is where people decide if they love your plushie. Basic faces rely on two eyes and a smile, placed wherever they fit. Advanced Crochet Patterns for Stuffed Animals treat the face like a map. Eye size, spacing, and height change the whole mood, even if everything else stays the same.

Want "baby cute"? Make the eyes larger, lower, and slightly farther apart. Want "wise owl"? Add a brow ridge and place eyes higher with a defined beak. Want "wolf"? Narrow the muzzle, angle the eyes, and add cheek shaping.
Here are face upgrades that separate basic from advanced:
- Basic: eyes placed after stuffing, wherever they look okay
- Advanced: eyes marked early with pins, checked from all angles
- Basic: flat muzzle sewn on top
- Advanced: muzzle integrated with shaping, or sculpted with thread
- Basic: embroidery without structure
- Advanced: embroidery supported by under-shaping and stitch direction
If you use safety eyes, remember they're not always "safe" for the youngest kids. They can be a choking hazard if the backing fails or if the fabric stretches. For baby-safe options, many makers switch to embroidered eyes, felt eyes with strong stitching, or crocheted eye patches sewn down tightly.
A good workflow is to test the face before you commit:
- Stuff the head lightly and pin the muzzle in place
- Pin eye markers (even if you'll embroider later)
- Take a quick photo from the front and side
- Adjust spacing by one stitch at a time
- Only then sew and fully stuff
For more support on building plush structures and joining parts cleanly, check how to crochet stuffed animals. Even experienced crocheters pick up new tricks when they focus on assembly.
Assembly, Structure, and Posing: Making Toys That Hold Their Shape
Advanced plushies don't just look better, they feel better. Basic patterns often get floppy limbs, wobbly heads, or uneven stuffing. Advanced Crochet Patterns for Stuffed Animals plan structure early so the final toy sits, stands, or hugs in a stable way.
Start by thinking about the "load points," meaning where weight pulls. Heads pull forward. Tails pull backward. Long ears pull down. If you don't reinforce those points, the toy slowly slumps.
Use these structure options, depending on your goal:
- Denser stitches with a smaller hook for firm fabric
- Stronger stuffing in the neck and hips
- Flat pellets (in a sealed pouch) for a sit-down base
- Internal support (pipe cleaners or craft wire) for poseable limbs
- Strategic sewing (attach limbs slightly forward for a "hug" pose)
If you add wire, write clear notes in your pattern about who it's for. Poseable toys are usually better for collectors, not babies.
Here's a simple assembly sequence that reduces mistakes:
- Finish all parts and block (shape) them lightly if needed
- Add facial features before final stuffing when possible
- Stuff and close openings cleanly with a tight seam
- Pin all parts in place, then sew in a specific order (head, arms, legs, tail)
- Do a final "pose test" and add small embroidery details last
Pattern writers often forget this, but your seam style matters. Mattress stitch can hide joins on flat edges. Whip stitch is faster, but it can show if tension varies. If you're selling patterns, include a short "how I sew parts" note, or link readers to a tutorial. That builds trust and reduces support emails.
A 2026 trend you'll see more of is "display-ready amigurumi," meaning plushies designed for shelves and photos, not only play. People want strong silhouettes, stable sitting shapes, and clean finishing because social sharing drives discovery. Even if you don't chase trends, building in stability keeps your toys looking good for years.
FAQ Crafting Advanced Crochet Patterns for Stunning Stuffed Animals
How Do I Make Crochet Patterns for Stuffed Animals Look More Professional?
Focus on shaping, stitch consistency, and clean finishing. Use invisible decreases to reduce gaps, and choose a hook size that makes tight fabric. Plan where the face features go before you sew anything down. Photos help a lot, because they show crooked muzzles or uneven eyes fast.
What Yarn Works Best for Detailed Stuffed Animals?
Smooth yarn shows stitches and shaping clearly, which is great for detailed faces and crisp colorwork. Acrylic and cotton are common because they're consistent and come in many colors. Fluffy yarn hides stitches, which can be great for bears, but it can blur details and make counting harder.
How Can I Stop Holes From Showing When I Stuff Amigurumi?
Use a smaller hook than the yarn label suggests, and keep tension steady. Invisible decreases help prevent gaps on decrease rounds. Stuff in small amounts, and push stuffing into edges with a blunt tool. If holes still show, you may need tighter stitches or a different yarn ply.
Are Safety Eyes Always Safe for Kids' Toys?
Not always. Even well-made safety eyes can be a risk for very young kids if they come loose or if the fabric stretches. Many makers use embroidered eyes for baby gifts. Review general toy safety reminders from CPSC and make age-appropriate design choices.
How Do I Turn My Design Notes Into a Sellable Pattern?
Write every step as if the reader can't see your hands. Include stitch counts each round, clear assembly order, and exact placement notes for limbs and eyes. Test the pattern yourself, then have at least one other crocheter test it. For more help selling, you might also like advanced crochet pattern techniques.
Final Thoughts: Your Next "Stunning" Plush Starts with One Upgrade
Advanced Crochet Patterns for Stuffed Animals aren't about making things complicated. They're about making choices on purpose. Pick one upgrade for your next toy, like better eye mapping, slower decreases for smoother curves, or cleaner color changes.
If you want patterns that already do this work for you, keep exploring my Squarespace shop. I design plushies with strong shaping, clean assembly, and details that read beautifully in photos. If you're buying instead of drafting, compare options and features in buy custom crochet patterns online.