
Advanced Crochet Pattern Techniques for Gifts: Make Unique Pieces People Want to Buy
Your gift looks "nice"... until you spot the same pattern on three other maker tables.
If you're trying to make something that feels one-of-one, the win usually isn't a cuter yarn or a trendier color. It's better structure, cleaner shaping, and details that look intentional. That's what advanced crochet pattern techniques for gifts really mean in practice.
We sell crochet patterns and we crochet basically anything, so we spend a lot of time on the tiny decisions that make people pick something up, turn it over, and say, "Okay, that's special." This guide is a step-by-step way to add that "special" on purpose, whether you're gifting or selling.
Choose the "Wow Factor" First (so You Don't Overbuild)
Most advanced work fails for a simple reason, the maker adds every fancy trick at once. The piece gets stiff, busy, and hard to finish.
Start by picking one primary wow factor and one supporting detail. That keeps your time under control and your design readable.
Here's a decision framework we use:
- Choose sculpted shaping if you want "realistic" and high-end (great for animals, dolls, and character gifts).
- Choose texture engineering if you want "touchable" and cozy (great for blankets, scarves, plush bodies).
- Choose colorwork control if you want "graphic" and modern (great for bags, wall hangings, themed gifts).
- Choose luxury finishing if you want "store-bought neat" (great for gifts to non-crafters and for selling).
Then add one supporting detail:
- A micro-detail (eyelids, paw pads, embroidered freckles)
- A construction upgrade (lined bag, hidden seam, removable accessory)
- A presentation upgrade (tag, care card, sturdy packaging)
This "one main, one support" rule also makes pricing easier. People pay for a clear upgrade they can see.
Transition point: once you've picked your wow factor, you can choose the specific techniques that create it.
Four Advanced Crochet Upgrades That Make Gifts Look Custom
These are the upgrades we reach for most because they change the final look without requiring a totally different craft.

1) Invisible Shaping with Strategic Increases and Decreases
"Advanced shaping" isn't just using increases and decreases. It's where you place them so the curves look smooth.
Practical steps:
- Offset your increases each round (don't stack them in the same vertical line).
- Use paired decreases to control direction. Two decreases on one side can "pull" a snout or belly inward.
- Try the invisible decrease (insert hook through front loops only) when working in single crochet. It reduces the little bump that regular decreases can leave.
- Change stitch height on purpose (single crochet next to half double crochet next to double crochet) to build slopes without sharp angles.
This matters for gifts because faces and rounded parts are what people look at first. Smooth curves read as "pro."
If you want to go deep on this style of construction for plush, our walkthrough on how to crochet complex patterns for realistic stuffed animals is built around shaping decisions like these.
2) Clean Color Changes That Don't "Stair Step"
Hard color edges often look jagged in the round. For gifts and sales, crisp lines matter.
Pick the method based on the look you need:
- For single-stitch specks and dots, use surface crochet (a top layer of stitches added after the base). It keeps the base fabric strong.
- For sharp blocks of color, change color on the last yarn over of the prior stitch, then tighten the first stitch of the new color.
- For stripes in the round, use a jogless join (shift the seam by slipping or adjusting one stitch so the stripe edge lines up).
Caveat: some "jogless" methods change stitch count or tension. Test on a small tube before committing.
3) Texture That Stays Soft (Not Board-Stiff)
Textured stitches can turn stiff fast, especially with tight tension.
Use texture like seasoning, not the whole meal:
- Put heavy texture (bobble, popcorn) on small areas, like cheeks, paw pads, or a sweater panel.
- Use lighter texture (front post, back post, ribbing) where you need stretch, like cuffs and hat brims.
- Mix a smooth base with raised details for contrast. A smooth plush body with textured ears looks intentional.
Non-obvious trade-off: plush yarn plus heavy texture can hide your stitch definition, but it also hides mistakes. Cotton shows everything, including uneven tension.
4) Finishing That Sells the Piece Before Anyone Touches It
Finishing is where "handmade" becomes "gift-ready."
Our go-to finishing checklist:
- Weave ends with direction changes (go one way, then split back) so they don't worm out.
- Steam block carefully for acrylic, and wet block for natural fibers. Always test a swatch first.
- Add structure where needed, like a fabric lining for bags or a stiff base insert.
- Match your stuffing to the fabric, firmer stuffing for tight stitches, softer stuffing for drapier fabric.
Safety note for gifts for young kids: if you're making toys, use embroidered features or properly secured safety eyes and follow the safety guidance that applies in your area. Requirements can vary.
Transition point: now you've got the "tools." Next is how to combine them into a gift that also makes sense to sell.
A Worked Example: Turning One Plush Pattern Into Three Gift Tiers
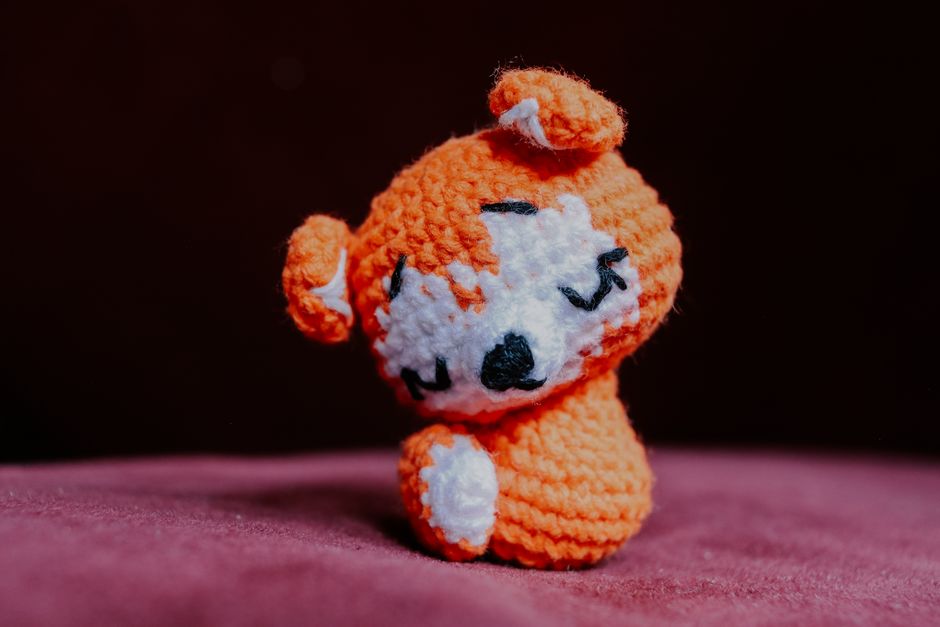
Let's take a simple crochet animal base (head + body + limbs). The base pattern is your "core." The advanced techniques create tiers.
Tier 1: Quick Gift (Looks Special, Stays Fast)
Goal: one evening or weekend, still feels custom.
- Use smooth shaping with offset increases.
- Add two small surface crochet accents (tiny nose line, toe beans).
- Use one accessory made from rectangles (a scarf or bandana).
Why it works: the accessory gives personality, and surface details look "drawn on," which reads as designed.
Tier 2: Premium Gift (Better Sculpting, Better Face)
Goal: a gift you'd be proud to give to an adult.
- Sculpt the head with stitch-height changes (single crochet to half double crochet to double crochet and back).
- Add eyelids with small crescent shapes sewn above the eyes.
- Use a jogless stripe or planned color blocks for a clean belly patch.
Pricing and time trade-off: faces take time. If you're selling, your premium tier should be priced around the face work and assembly, not just the yarn.
Tier 3: "Collector" Version (the One People Post Online)
Goal: maximum uniqueness, highest sale value.
- Add internal structure (a weighted base or firm insert so it sits well).
- Add removable clothing (tiny cardigan, overalls, or a costume) with real closures (buttons, ties, snaps).
- Add micro-embroidery (freckles, whisker dots, subtle blush) and needle-sculpting (tightening stitches with a needle to shape cheeks).
Important caveat: weighted inserts can change how the item is treated as a toy in some places, and can be unsafe for small children. For selling, label clearly and keep "decor" versions separate from child-safe versions.
If your focus is specifically stuffed animals you can sell, the ideas in advanced crochet stuffed animal patterns you can sell pair well with this tiered approach.
Transition point: after technique and design choices, the next thing that decides gift quality is yarn choice.
Yarn and Materials: Pick for Feel, Not Just Color
Advanced work can look average if the yarn fights you.

Here's how we choose yarn for gifts and sales:
- Cotton for clean stitch definition and crisp shapes (great for amigurumi details, bags, coasters). It can feel less cuddly.
- Acrylic for easy care gifts. It's a strong choice for blankets, wearables, and kid gifts.
- Wool or wool blends for warmth and bounce. Great for hats and textured stitches.
- Chenille or "velvet" yarn for plush. It hides stitches and can shed, so it needs secure finishing.
Material pairings that make advanced techniques easier:
- For sculpted shaping, use a yarn that shows stitches (cotton or smooth acrylic).
- For colorwork, avoid fuzzy yarns that blur edges.
- For tiny details, keep a matching embroidery thread or thinner yarn on hand.
Tool note: hook size is part of the "material." Tight amigurumi usually needs a smaller hook than the label suggests to keep stuffing from showing.
Selling-Or-Gifting Checklist: the Stuff People Notice First
This is the quick quality control pass we do before listing an item or wrapping it as a gift.
- Symmetry check: ears, eyes, limbs line up from the front view.
- Seam check: the back seam doesn't spiral into the face side.
- Touch check: nothing scratchy sits where hands will hold it.
- Durability check: tug gently on attachments and ends.
- Photo check (for sales): take one photo in harsh light. If the shaping still looks smooth, it will look great anywhere.
If you're selling finished items, also think about repeatability. A technique that looks amazing but takes forever might still be worth it, but only as a premium tier.
FAQ
How Long Does It Take to Learn Advanced Crochet Techniques Well?
Most crocheters can add one advanced upgrade in a weekend if they practice on a swatch first. Sculpted shaping and clean assembly take longer because they involve judgment, not just stitch steps.
What's the Best "Advanced" Technique If I Want to Sell More?
Clean finishing and consistent shaping tend to move the needle fastest. Buyers may not know the technique name, but they feel the quality.
How Do I Keep Advanced Details From Making the Piece Look Busy?
Use the "one main, one support" rule. Let one feature be the star, and keep everything else quiet.
Make One Upgrade This Week, Then Stack the Rest
Pick one project you already make and choose one wow factor to improve, shaping, color edges, texture placement, or finishing. Make two versions, one basic and one upgraded, and compare them side by side.
That single comparison teaches you more than ten random tutorials. If you want patterns built for this kind of intentional detail, browse our crochet pattern shop on Squarespace at artncraftartncraft.art, and keep an eye out for designs that include shaping notes, finishing steps, and options for "simple" and "premium" builds.