
Craft Unique Crochet Animal Designs: Patterns to Sell and Succeed
A cute animal plush can take hours to make, but the pattern that creates it can sell for years.
If you're trying to build a pattern shop, the real challenge isn't learning stitches. It's choosing ideas that stand out, then turning them into clear, reliable instructions buyers can finish. That's what makes unique crochet patterns for animals worth paying for.
We design crochet patterns all day, and we've learned a simple truth: "unique" isn't random. It's specific. It's repeatable. And it solves a buyer's problem (they want something no one else has, but they still want it to work).
What Makes Unique Crochet Patterns for Animals Sell (Not Just Get Saved)
Most animal designs look different in photos, but feel the same in a cart. Buyers usually decide in a few seconds. They're scanning for one clear reason yours is the one.
In our experience, the animal patterns that sell consistently have at least one "signature" that's easy to see and easy to describe.
Here are signatures that work well because they're visual and pattern-friendly:
- A bold silhouette (chunky head, tiny body, long legs, big tail)
- A themed twist (forest witch fox, café capybara, punk rock raccoon)
- A texture moment (bobble belly, loop-stitch mane, faux-fur yarn accents)
- A strong color story (two-tone belly, gradient wings, contrast paws)
- A prop that belongs (backpack, teacup, little hoodie, flower crown)
Uniqueness also needs to survive real-world yarn choices.
A design that only looks good in one exact yarn becomes fragile for buyers. A better goal is "distinct even in basic worsted acrylic." If it still reads as your animal in cheap yarn, it's a strong product.
One more non-obvious sales driver is how the pattern reads at a glance.
A buyer who's paying for a pattern wants a smooth build. If the shaping is clever but confusing, you'll get abandoned projects, support emails, and low reviews. Your uniqueness has to be visible without making the construction a puzzle.
Choose Your "Unique" Lane: a Simple Decision Framework
If you try to make every design special in every way, you'll burn out fast. Pick one lane per pattern. Build the design around it. Then keep everything else simple and clean.

Use this framework to choose a lane that matches your skills and your audience.
Lane 1: Cute and Fast (Beginner-Friendly)
Choose this lane if you want more buyers, fewer questions, and patterns that people finish.
What it looks like:
- Minimal sewing (2 to 5 seams)
- Simple shapes (spheres, tubes, flat ovals)
- Safety-eye friendly, but also embroidered options
Where uniqueness comes from:
- One standout feature, like a huge snout or floppy ears
- A tiny accessory that takes 10 minutes but changes everything
Trade-off: You'll need great photos and branding to stand out, because the technique is simpler.
Lane 2: Detail and Display (Intermediate to Advanced)
Choose this lane if you love shaping, surface detail, and "wow" projects.
What it looks like:
- Colorwork (tapestry crochet), surface crochet, or embroidery details
- More pieces, but each one is purposeful
- Optional upgrades, like wired wings or poseable tails
Where uniqueness comes from:
- Realistic markings (raccoon mask, tiger stripes, spotted fawn)
- A shaped head that looks like the animal even before details
Trade-off: More testing time and more pattern pages. You're selling a bigger promise, so clarity matters more.
If you want to build this style, our guide on buying detailed crochet patterns for sale with complex designs shows what "high detail, still readable" looks like from a buyer's view.
Lane 3: Character and Story (Collectible Series)
Choose this lane if you want repeat customers.
What it looks like:
- A consistent body base
- Swappable heads, outfits, hats, and props
- Names and "roles" that create a set (baker bear, librarian bunny, astronaut otter)
Where uniqueness comes from:
- Theme sets people collect
- Mix-and-match options that feel custom
Trade-off: You must keep sizing consistent across the series, or buyers get frustrated when parts don't fit.
Worked Example: Designing a Sellable "Signature" Animal Pattern
Here's a concrete way we build uniqueness without making the pattern fragile.

Let's say you want to design a capybara plush. Plenty exist. So you pick one signature: "square snout + sleepy cheeks," plus one prop: a tiny citrus slice hat.
Now you turn that idea into pattern choices that help the buyer.
Step 1: Lock the Silhouette First
For the capybara body, keep it as a simple oval tube.
Make the head slightly wider than the body so it reads "capybara" even before details. The buyer can see progress fast, which keeps them going.
Step 2: Make the Signature Feature Easy to Execute
The square snout sounds hard, but it can be simple:
- Crochet the snout as a small box shape (a short rectangle folded and seamed)
- Or shape it with increases on the corners only, so it looks squared off
The key is giving one option that's "no-fail." If you include a fancier option, label it as an upgrade.
Step 3: Use Texture Where It Helps, Not Everywhere
A sleepy cheek can be a small bobble or a tiny felt-free puff.
Limit bobbles to two spots. Too many bobbles change the stitch count feel and can throw off tension for beginners.
Step 4: Add the Prop as a Mini Pattern Inside the Pattern
The citrus slice hat should take 15 minutes. It's the photo hook.
Write it as its own section with a materials line and stitch counts. Buyers love a clear "add-on." It also makes your design feel premium without adding hours.
Step 5: Build in Yarn Flex
Give at least two yarn paths:
- Worsted weight with a 3.5 to 4.0 mm hook for a classic plush
- Chenille velvet yarn with a larger hook for a squishy plush
You don't have to promise exact finished size. But do explain what changes (stitch definition, firmness, safety eyes). This cuts down on angry messages later.
That's the pattern logic behind uniqueness: one clear signature, one clear prop, and a body construction buyers can trust.
Pricing, Licensing, and "Patterns to Sell" Basics (Without the Mess)
Pricing is part math and part positioning.
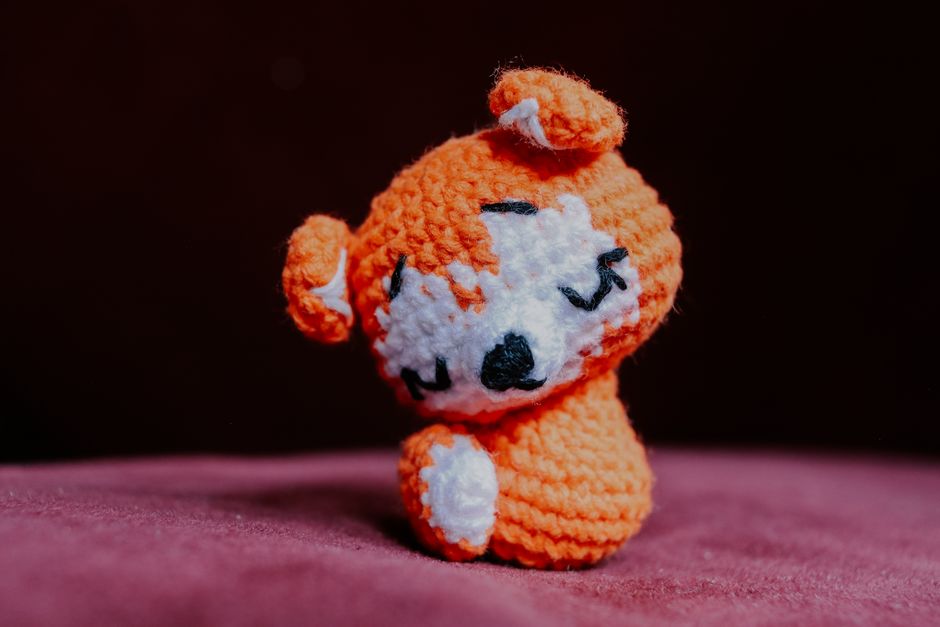
If your pattern is a quick beginner make, lower pricing can make sense because your audience is wider. If it's detailed with many pages, photos, and options, higher pricing fits the value.
A practical way to decide is to price by buyer outcome, not your hours.
Buyers pay more when your pattern gives them:
- A finished look they can't easily get elsewhere
- Fewer confusing steps
- Options (different faces, ear styles, accessories)
- Helpful photos at tricky parts (sewing, shaping, color changes)
Licensing matters too.
Most independent pattern sellers allow people to sell the finished items in small quantities, but not to copy or repost the pattern. If you set rules, write them in plain language on page one. Keep it short.
Also plan for support.
If you sell patterns, you will get messages. You can reduce them by adding:
- A materials list that names the yarn weight (and what to substitute)
- A stitch glossary (and whether you use US or UK terms)
- A "read this before you start" section with gauge expectations
If you're building a shop around plushies, it can help to study how buyers search and compare. This article on where to buy crochet patterns for stuffed animals online shows the buyer mindset you're selling into.
Testing Your Pattern so Buyers Actually Finish
Pattern testing is where a good design becomes sellable.
A single maker can follow your logic because it's in your head. Multiple testers show where your pattern is unclear, where stitch counts break, and where "obvious" steps aren't obvious.
Here's what we look for during testing:
- Stitch counts at the end of every round for shaped parts
- Clear notes on invisible decrease (a decrease method that reduces holes)
- Photos for any step where the shape changes fast
- At least one tester using different yarn, like acrylic instead of cotton
Write to prevent the most common failure points.
Sewing is the big one. Tell people where to pin. Tell them what angle the ears should tilt. If the head should sit forward, say that.
Also, protect buyers from safety issues.
If a toy is meant for kids under 3, safety eyes can be a choking hazard. Many makers switch to embroidered eyes for little kids. The U.S. Consumer Product Safety Commission has general toy safety information here: CPSC toy safety guidance.
You don't need to turn your pattern into a legal document. A simple note helps buyers make safer choices.
A Quick Product Plan for Your Next 3 Animal Patterns
A shop grows faster when patterns relate to each other.
Instead of three random animals, build a mini collection. It helps your photos look consistent, and it encourages bundle buys.
Try this simple plan:
- Pattern 1: Your "fast win" design (cute, low sew, clear photos)
- Pattern 2: The detailed showpiece (markings, shaping, optional upgrades)
- Pattern 3: A remix using the same base (new ears, new snout, new prop)
Keep one shared element across the set, like the same body base or the same accessory style.
That's how you turn one good idea into a product line, not a one-off.
If you want to go deeper on building your own designs from scratch, start with how to create unique crochet patterns for stuffed animals.
Your next best seller probably isn't a never-before-seen animal. It's a familiar animal with a signature only you would choose, written in a way that makes makers feel confident.
If you want patterns that already have that "signature + clarity" balance, you'll find ours at https://artncraftartncraft.art, and we keep adding new animals and new twists.