
Detailed Crochet Patterns for Stuffed Animals: Explore Adorable, High-Detail Amigurumi
"Cute" is easy. Clean, smooth, and gift-worthy is the hard part.
If you've tried making a plushie and ended up with a lumpy head, wobbly legs, or a face that looks a little haunted, you're not alone. Detailed crochet patterns for stuffed animals help because they don't just tell you what to stitch. They tell you where shape happens, how parts line up, and how to get that polished look.
We design and sell crochet patterns at Art n Craft, and we crochet basically anything. The biggest difference we see between "I made a toy" and "this looks store-bought" is detail: stitch counts that actually match, shaping that's planned, and assembly steps you can follow without guessing.
Detailed Crochet Patterns for Stuffed Animals: What "Detailed" Really Means
A detailed pattern isn't just longer. It's more specific in the places that matter.
Here's what to look for if you want stuffed animals that come out the way the photos look.
- Round-by-round stitch counts (not "increase evenly" with no math). You should always know what your stitch total is.
- Shaping notes that explain why a step exists (example: "this decrease creates the chin").
- Placement guides for eyes, snout, ears, and limbs (example: "place eyes between rounds 10 and 11, 7 stitches apart").
- Assembly order (which part to sew first, and how to pin it). This stops the "one arm higher than the other" problem.
- Yarn and hook guidance based on tight fabric (amigurumi needs firm stitches so stuffing doesn't show).
Detail also shows up as "error-proofing." A good designer anticipates what you'll mess up and prevents it with checks.
Examples of checks that save your sanity:
- A reminder to move your stitch marker each round.
- A quick "end of round stitch count" line.
- A note like "if your head starts to point, you may be decreasing too early."
If you're still building pattern-reading comfort, start with How to Read Crochet Patterns. Being able to spot repeats, counts, and shaping cues makes every plushie cleaner.
Choose the Right Pattern for the Look You Want (Decision Framework)
Not every "detailed" pattern is detailed in the same way. Some focus on realism. Some focus on speed. Some focus on mix-and-match outfits.

Use this quick framework to pick what fits your goal.
Pick "Simple Shapes + Detailed Face" If You Want Fast and Cute
This style uses a basic body (ball, tube, oval) and puts detail in the face and ears.
Choose it if:
- You want a weekend project.
- You're making multiples (party favors, classroom gifts).
- You care most about expression (eyes, cheeks, muzzle).
Trade-off: the silhouette can look "classic amigurumi" rather than realistic.
Pick "Segmented Shaping" If You Want a More Realistic Animal
These patterns often have separate chest pieces, sculpted snouts, or shaped haunches.
Choose it if:
- You want a toy that looks like a specific animal (fox, bunny, dragon).
- You like sewing and pinning parts carefully.
- You want the body to have posture (sitting, curled tail, bent legs).
Trade-off: more parts, more counting, and more time in assembly.
Pick "Texture and Colorwork" If You Want Detail Without More Parts
Some patterns create "fur," stripes, or spots with stitch texture or planned color changes.
Choose it if:
- You hate sewing tiny pieces.
- You want detail that reads from across the room.
- You're okay with yarn management.
Trade-off: textured stitches can eat yarn, and color changes show if you don't tidy them.
A Non-Obvious Tip: Match Detail Level to Your Yarn
Tiny, intricate shaping can disappear in fuzzy yarn. Plush yarn hides stitches, which can be great for softness but bad for crisp faces.
If the pattern photos look sharp and sculpted, you'll usually get closer results with a smooth yarn (like cotton or acrylic) before you try blanket yarn.
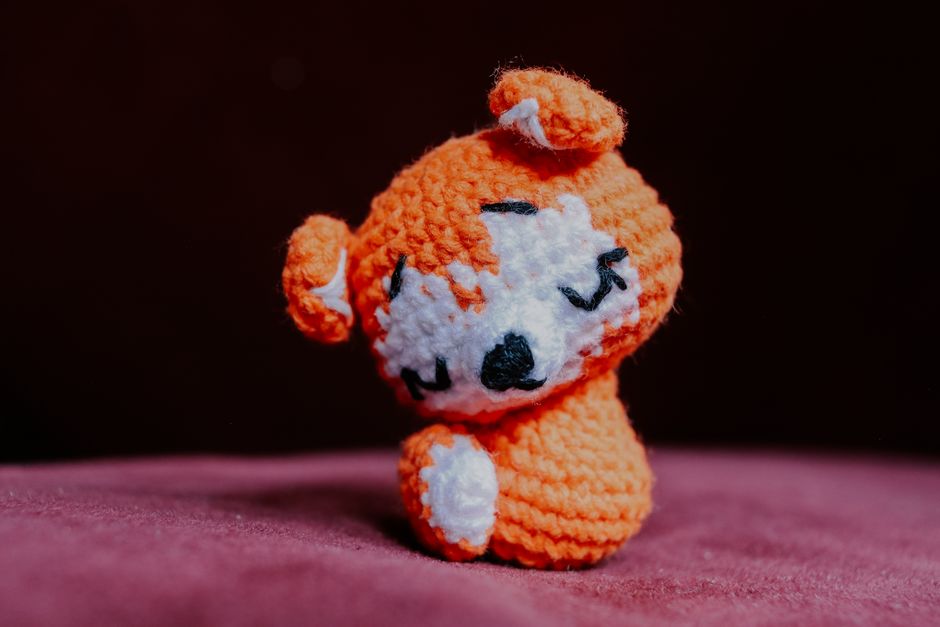
Worked Example: Turning a "Basic Bunny" Into a Polished Plush
Here's a concrete way we upgrade a common beginner bunny into something that looks intentional, even if the base pattern is simple.

We'll focus on three places where detail matters most: the face, limb alignment, and the neck.
Step 1: Plan the Face Before You Stuff
Many people stuff the head firm first, then fight to place eyes and a nose. That's backwards for clean placement.
- Crochet the head until you've finished increases and you're in the straight rounds (the widest part).
- Insert safety eyes while the opening is still large.
- Add the nose thread or muzzle shaping now, while you can reach inside.
- Start stuffing only after the face is locked in.
Concrete placement approach (works for lots of round heads):
- Put eyes one round above the widest point.
- Space them so there's 6 to 10 stitches between, depending on head size.
- Angle them slightly inward for "cute," or keep them straight for "neutral."
Small change, big result: add a tiny eyebrow stitch (just a short strand of embroidery thread) one round above each eye. It makes the expression read clearly without adding parts.
Step 2: Build a Neck That Doesn't Flop
A floppy head usually comes from one of two issues: loose stitches or a neck that's too thin.
Two fixes that keep the same "look," but improve structure:
- Go down a hook size for the last few head rounds and the first few body rounds. This tightens the join.
- Add a "support column" of stuffing. Roll a small tube of stuffing tighter than you think, and place it right in the neck area.
If the toy is for a baby or toddler, skip hard supports like wire. Soft structure is safer.
Step 3: Make Arms and Legs Match (Without Measuring Tape)
"Even" isn't about inches. It's about matching stitches.
Do this instead:
- Pin the first limb where you like it.
- Count how many stitches sit between the limb edge and the side marker seam.
- Place the second limb with the same stitch spacing on the other side.
If your pattern doesn't tell you where to put limbs, use body rounds as landmarks:
- Arms often look best centered around the "shoulder" round, just below the neck.
- Legs look stable when they sit one or two rounds forward from dead center, so the toy can sit.
A clean finish trick: sew with the same yarn, but do the final pass with a slightly tighter tension. It pulls gaps closed without warping the shape.
Common Mistakes That Ruin Detail (and How to Avoid Them)
Detailed patterns can still look messy if the basics slip. These are the issues we see most often.
Stitch Tightness Changes Mid-Project
Tension drift happens when you swap hooks, change posture, or just relax as you go.
Fix:
- Check fabric every few rounds. Stuffing should not show through.
- If holes appear, go down a hook size, not up.
Wrong Stuffing Amount (Both Too Much and Too Little)
Overstuffing stretches stitches and makes gaps. Understuffing makes shapes collapse.
Fix:
- Stuff in small pinches.
- Shape with your fingers as you go, especially around cheeks and paws.
Visible "Step" at Color Changes
In continuous rounds, color changes can create a jog (a little step).
Fix:
- Change color on the last yarn-over of the stitch.
- Hide the jog at the back seam, or where an ear covers it.
Rushing Assembly
Sewing is where most plushies become "off." Detailed patterns often include assembly notes for a reason.
Fix:
- Pin everything first.
- Look at the toy from front, side, and top before sewing.
- Sew a few stitches, check, then keep going.
If you want patterns that lean harder into shaping, texture, and advanced construction, save crochet patterns for advanced techniques for your next make.
How We Think About "Adorable" (so Your Finished Toy Looks Like the Photo)
Adorable is mostly proportion.
If you want that cute look on purpose, aim for these design choices:
- Bigger head than body (even slightly). It reads as sweet and cartoon-like.
- Low-set eyes (closer to the middle of the head than the top). It softens the face.
- Shorter limbs for babies and chibi-style animals, longer limbs for lanky characters.
- One standout detail (tiny blush spots, a scarf, a belly patch, or a tail shape). Too many details can look busy.
The best part is you can apply these ideas to almost any base pattern. Detail isn't always more steps. Sometimes it's smarter placement.
Make Your Next Stuffed Animal One You'd Actually Gift
If you want a plushie that comes out clean, choose detailed crochet patterns for stuffed animals that give stitch counts, placement notes, and a clear assembly plan.
That's the difference between guessing and building.
If you're collecting patterns and want a reliable place to grab designs you won't have to "fix" as you go, start here: Where to Buy Crochet Patterns Online.