
Custom Crochet Patterns for Gifts: Create One-Of-A-Kind Presents and Products That Sell
You promised a "personal" gift, and now you're staring at a calendar and a half-finished idea.
That's exactly where custom crochet patterns for gifts shine. Instead of hunting for the perfect pattern and hoping it matches the person, you build a design around their quirks, colors, pets, hobbies, and inside jokes. The best part, the same pattern can become a repeatable product you can sell, not just a one-time present.
We design crochet patterns for a living, and the fastest path to a great custom pattern is not "more detail." It's the right kind of detail, picked on purpose, so the project is cute, buildable, and gift-ready.
Custom Crochet Patterns for Gifts: Start with a Simple "Gift Brief"
A custom pattern goes smoothly when you decide what must be true about the finished item.
Before you sketch anything, write a tiny gift brief. Keep it short enough to fit on a sticky note.
Here's the exact framework we use:
- Who it's for: age range, style (cute, classy, silly), favorite colors
- What it is: plush, hat, bag, wall hanging, ornament, etc.
- Size: hand-sized, pillow-sized, keychain, wearable sizing
- Deadline: real date, plus "buffer days" for redoing parts
- Skill level: what you can comfortably repeat without stress
- One signature detail: the single feature that makes it unmistakably theirs (cat markings, team colors, a tiny prop)
That last line matters most. A gift feels custom because of one bold, readable detail, not because you added ten tiny things no one notices.
A quick trade-off to decide early: details vs durability.
Plenty of custom gifts are for kids. That means safety eyes might be a bad plan, and delicate pieces (thin straps, tiny sewn-on charms) can get pulled off.
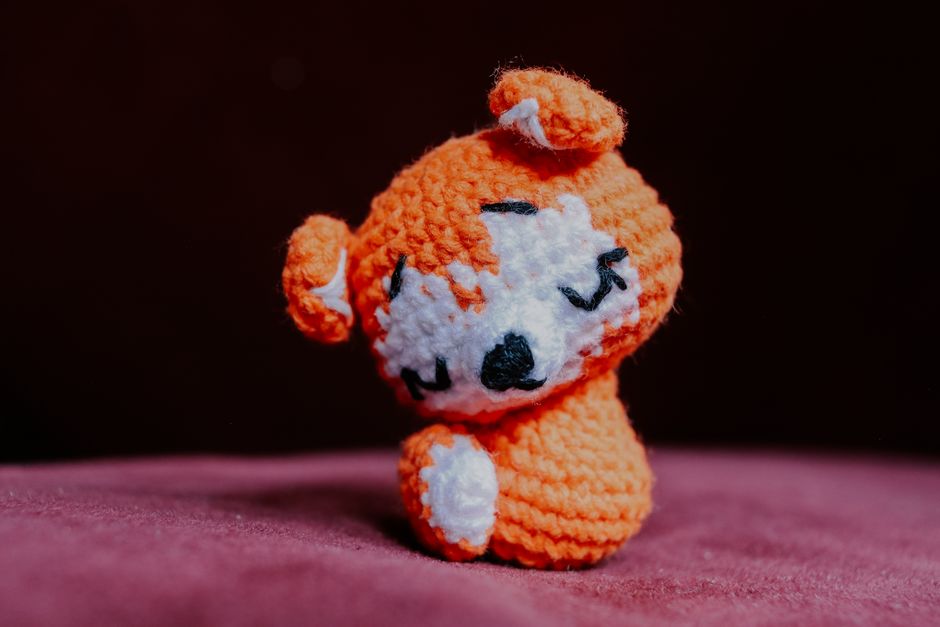
If you're making amigurumi (stuffed crochet toys), embroidered details usually hold up better than glued or loosely stitched add-ons.
Choose Your Custom Route: Remix, Resize, or Design From Zero
Custom does not always mean starting from a blank page.

We use a three-lane decision framework depending on the time you have and how unique the final item needs to be.
Route 1: Remix an Existing Base (Fastest, Lowest Risk)
Choose this if the shape already exists in your pattern library and you mainly want a new "skin."
Common remixes:
- Swap colors to match a pet or favorite character vibe
- Change ears, horns, tails, or hair
- Add a tiny accessory (scarf, backpack, mini flower)
- Change facial expression by shifting embroidered lines
This route is perfect for gifts on a deadline, because the body math is already tested.
If you want a strong base for toys, our guide on how to crochet detailed patterns for unique stuffed toys pairs well with remixing, since it focuses on shaping and repeatable detail.
Route 2: Resize and Rebalance (Best for "Same, but Different")
Choose this if the idea is clear, but the size needs to change.
Resizing is not just "use thicker yarn." The proportions change too.
If you scale up without adjusting, you often get:
- Long floppy necks that can't hold a head
- Heavy limbs that twist at the join
- Faces that look too far apart
The fix is to rebalance the structure. That can mean a wider neck, extra rounds in the torso, or changing where you increase and decrease.
Route 3: Design From Zero (Most Unique, Highest Testing Need)
Choose this if the gift hinges on a very specific shape, like a person's custom mascot, a one-off creature, or a logo turned into a plush.
This route needs more testing time because every new shape has "surprises," especially around joints and curves.
A realistic plan helps. Build one prototype fast, then one "gift version" with the improvements.
Worked Example: Turning a Pet Photo Into a Sellable Plush Pattern
A lot of custom crochet patterns for gifts start with a photo. Pets are the big one.
Here's a concrete way we translate a pet photo into a pattern you can repeat and sell later.
Step 1: Pick the Base Shape That Does Most of the Work
If the pet is a cat, we usually start with a simple cat body silhouette that already sits well and doesn't topple.
We decide early:
- Sitting plush (stable, easier gifting)
- Standing plush (cute, but trickier balance)
For sales success, sitting plushies get fewer "it won't stand" complaints.
Step 2: Identify the "Read From Six Feet Away" Markings
From a single photo, you might see ten distinct fur changes. You do not need all ten.
We pick 2 to 3 high-impact markings, like:
- White chest triangle
- Dark ear tips
- One bold stripe down the back
Then we plan them as clean color blocks, not speckles.
Step 3: Choose the Technique for Each Marking (and the Trade-Off)
Each detail has a best method depending on how you want the fabric to look.
- Color changes in the round: clean blocks, but you must manage jogs (the little step where rounds change)
- Duplicate stitch (embroidering stitches on top): great for small spots, adds thickness
- Surface crochet (stitching on top of fabric): bold lines, can snag if too loose
For gifts, duplicate stitch often wins because it's sturdy and doesn't distort the base shape.
Step 4: Lock Down Materials so the Pattern Repeats
If you want to sell the pattern later, you need consistent results.
We write down:
- Yarn weight (like worsted or bulky)
- Fiber type (cotton, acrylic, wool blend)
- Hook size used
- Finished size (even an approximate range)
Not every buyer uses the same yarn, but your pattern needs a clear "as designed" setup.
Step 5: Write the Pattern Like a Recipe, Not a Diary
A sellable pattern is easy to follow even for someone who doesn't read your mind.
We include:
- Stitch counts at the end of rounds
- Notes like "place marker at start of round"
- Clear assembly order (head first, then body, then limbs)
- Exact placement guidance (for example: "attach ears between Rounds 4 and 7, 10 stitches apart")
That last line is where custom patterns become professional. Placement details are what stop a cute plush from turning into a wonky one.
If you want more help on the product side, our post on tips for custom crochet patterns for sale that people actually buy goes deeper into making patterns customers finish.
Make It Gift-Ready and Sale-Ready at the Same Time
A custom gift pattern can become a product if you package it like a customer will use it.

That means you design for two audiences:
- The person receiving the finished item
- The person making it from your pattern later
Here's the checklist we use to make a pattern "gift and shop" friendly.
Build in a "Personalization Slot"
This is a planned spot where a maker can swap something without rewriting the whole pattern.
Examples:
- A blank heart tag where initials can be embroidered
- A scarf color section that's easy to change
- A mini accessory that can be swapped (flower, bow, tiny tool)
That one slot turns a design into a repeat seller because buyers can customize without asking you for edits.
Write a Clear Skill Level and Time Expectation
Don't promise "easy" if it needs tight tension, shaping, and lots of sewing.
We label difficulty based on what actually slows people down:
- Color changes
- Sewing pieces neatly
- Keeping stitch counts consistent
- Special shaping (like cheeks, paws, snouts)
If it's a gift, the maker needs to know what they're signing up for.
Include Finishing Notes That Prevent Disappointment
Finishing is where gifts look "handmade" in the good way.
A few notes that matter:
- How much to stuff and where to leave it softer
- How to close seams cleanly
- How to hide yarn tails so kids can't pull them out
Those details reduce last-minute panic, and they reduce pattern refunds later.
Common Pitfalls We See (and How to Avoid Them)
Custom patterns fail for predictable reasons.
Fix these early and your gift will look intentional, not improvised.
- Over-customizing the first version: Pick one signature detail, finish the prototype, then add more only if it still needs it.
- Choosing novelty yarn for a detailed face: Fuzzy yarn hides stitches, which hides expressions. Use smooth yarn for faces, then add texture as accents.
- Skipping stitch counts in written notes: Your future self will not remember. Write counts every round.
- Placing features "by vibe": Measure and write placements. Symmetry matters more than you think.
- Making tiny parts too tiny: Very small ears, fingers, or petals take the longest and are easiest to lose. Chunk them up for speed.
A quick reality check that helps, especially for sales, is to hand your draft pattern to someone else (or follow it yourself a week later) and see where you get stuck.
FAQ
Can I Sell Items Made From My Custom Pattern?
If you wrote the pattern yourself, you can usually sell finished items made from it.
If your custom pattern is based closely on someone else's pattern, check that designer's terms first. Some designers allow selling finished items, and some don't.
How Do I Price a Custom Pattern If I Plan to Sell It Later?
For the custom client, price based on the time to design and test. For the public pattern listing, price based on value and clarity, not your personal hours.
Those are two different products, a one-off service versus a repeat digital download.
What's the Fastest Custom Gift That Still Feels Personal?
A small plush or keychain with one bold, specific detail tends to land well. Think "their pet's markings" or "their favorite color plus a tiny accessory."
Fast and personal beats big and late.
Turn Your Next Gift Into a Pattern You're Proud to Sell
A great custom gift doesn't start with a complicated idea. It starts with one clear signature detail, a stable base, and notes that make the build repeatable.
If you want to turn your idea into a clean, sellable design, check out our pattern shop on https://artncraftartncraft.art and see how we format patterns so makers can actually finish them.