
Crochet Needle for Beginners: Techniques to Create Unique Patterns
You're following a beginner pattern, your stitch count is right, and it still looks... flat. Same yarn, same steps, but your swatch doesn't have that crisp texture you see in photos.
That's usually not a "you" problem. It's a technique problem, and most of it lives in how you use your hook. This guide is about crochet needle for beginners techniques you can use right away to make your fabric look more intentional, even if you only know a few stitches.
Fix the "Why Does Mine Look Different?" Problem First
New crocheters often think "unique patterns" means learning ten new stitches. Most of the time, you can get a fresh look by changing how the hook enters the stitch, how you hold the working yarn, or which loop you grab.
Here are the biggest differences we see when someone's piece doesn't match their goal:
- Loop choice: working through both loops, front loop only (FLO), or back loop only (BLO) changes texture a lot.
- Hook angle: the tilt of your hook decides how cleanly it grabs yarn, and how much the stitch twists.
- Tension habits: tight tension can make stitches short and stiff, loose tension can make holes you didn't plan.
- Yarn path: where the yarn runs over your finger affects consistency more than people expect.
If you take one thing from this article, let it be this: a "pattern look" is often a repeatable technique, not a complicated stitch chart.
Crochet Needle for Beginners: Four Hook Moves That Change Texture Fast
You don't need a new hook to do these. You need small, repeatable movements. Practice them on a 15-stitch swatch so mistakes don't feel expensive.
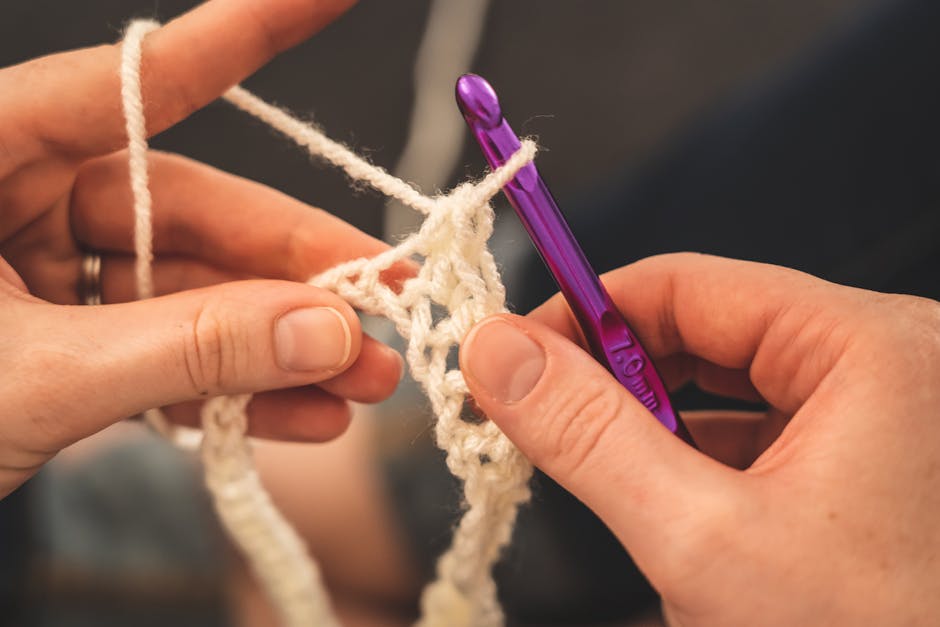
1) Use Loop Choice Like a Texture Switch
The simplest way to make a basic stitch look custom is to change which loop you work into.
- Both loops: the default, most solid fabric.
- BLO: gives a ridge and a stretchy "lined" look, great for cuffs and ribbing.
- FLO: creates a different ridge and can leave a subtle braided line.
Practical tip: if you're going for a clean ridge, keep your tension slightly looser than normal. Over-tight BLO is where beginners get accidental curling.
2) Control Height with "Lift" (Not Force)
Beginners often pull up a tall loop by yanking. That makes uneven stitches.
Instead, "lift" by raising your hook hand slightly as you pull the yarn through. The loop gets taller because your hand moved, not because the yarn was dragged tight.
This matters a lot in half double crochet and double crochet. Even height makes your fabric look like a real pattern, not a bumpy practice square.
3) Rotate the Hook, Don't Scoop
A clean yarn-over (wrapping the yarn over the hook) is mostly hook rotation.
If you scoop straight down, you split yarn more and your stitches twist. Rotate your hook so the throat (the narrower part) catches the yarn, then turn slightly downward as you pull through. It's smoother, and it protects fuzzier yarns.
If your yarn keeps splitting, that's usually a rotation issue before it's a yarn problem.
4) Use "Under" Yarn-Over for a Tighter, Defined Look (with a Caveat)
Most crochet uses "yarn over" from back to front. Some crocheters intentionally wrap from front to back (often called "yarn under"). It makes stitches look tighter and more defined, especially in amigurumi (stuffed shapes).
Caveat: it changes your gauge (size and stitch tightness). If you swap mid-project, your fabric can look like two different people made it. Pick one method and stick to it for that piece.
A Worked Example: One Beginner Stitch, Three Unique "Patterns"
Let's take the same base stitch and make three different looks using only hook technique.
We'll use single crochet because it's beginner-friendly and shows texture changes clearly.
Step 1: Make a Tiny Base Swatch
- Chain 21.
- Single crochet in the second chain from the hook and across (20 stitches).
- Chain 1, turn.
Now you'll repeat Rows 2 and 3, but with a different technique each time.
Version a: Clean and Solid (Both Loops)
Work each row as normal, inserting the hook under both loops.
Result: a smooth, sturdy fabric. This is a great "control" sample so you can compare the other versions.
Version B: Simple Ribbing (Back Loop Only)
Work every stitch in back loop only.
Result: ridges that look like knit columns. This is perfect for hats, cuffs, mug cozies, and anything that needs stretch.
Watch-out: if it starts to wave, your tension is too loose. If it curls into a taco, you're too tight.
Version C: a Textured Grid (Front Loop Only, Plus Intentional Lift)
Work every stitch in front loop only.
Then add one more tweak: on each stitch, pull up the loop to a consistent "tall single crochet" height by lifting your hook hand slightly.
Result: a fabric that looks more open and geometric, almost like a grid. It's still single crochet. It just doesn't look like beginner practice anymore.
If you want to take this farther, alternate rows:
- Odd rows: BLO
- Even rows: both loops
That simple alternation creates a "designed" texture that reads like a pattern.
Choose Your Technique Based on What You're Making (Decision Framework)
"Unique" is fun, but the wrong texture in the wrong project can be annoying to wear or hard to seam. Here's how we choose techniques in our own crochet patterns.

If You Want Stretch and Shape
Choose BLO ribbing or BLO sections.
- Best for: cuffs, hat brims, sock tops, fitted sleeves
- Trade-off: BLO can bias (lean) if your tension changes row to row
If You Want Crisp Stitch Definition
Choose tighter tension with smooth rotation, and consider "under" yarn-over if you'll use it consistently.
- Best for: stuffed shapes, bags, bold texture
- Trade-off: tighter fabric uses more yarn and can feel stiff
If You Want Drapey Fabric
Choose both loops, relaxed tension, and consistent lift on taller stitches.
- Best for: scarves, shawls, tops
- Trade-off: drape can highlight uneven tension, so count and check your edges
If You Want a Pattern Look Without Counting Headaches
Choose loop-based texture (FLO/BLO) and row repeats.
- Best for: blankets, simple wearables, quick gifts
- Trade-off: some loop-only fabrics can snag more easily, depending on yarn
After you pick your "main" technique, commit to it for the whole piece, or change it only at clear section breaks (cuff to body, brim to hat, border rows).
Common Beginner Snags (and How to Fix Them Fast)
Even good technique feels bad if one small issue keeps popping up. These are the problems we see most often.
Your Edges Keep Getting Wider or Narrower
This is usually missed first or last stitches.
Fix it by doing these two things:
- Put a stitch marker in the first stitch of every row for 10 rows.
- Count stitches at the end of each row until your hands learn the rhythm.
It's boring, but it works.
Your Fabric Looks Twisted
Your hook is probably entering the stitch at a different angle each time, or you're rotating the hook too late.
Slow down and make the hook movement identical for five stitches in a row. Identical is the goal, not fast.
Your Hands Hurt or Cramp
This can happen if you death-grip the hook or keep your wrist locked.
Try a softer grip and move from your fingers and forearm more than your wrist. If pain persists, take breaks and consider asking a medical professional for advice.
Turning Techniques Into Patterns You Can Actually Use
Once you find a texture you like, the next step is making it repeatable.
We suggest writing your "micro-pattern" like this:
- Stitch used (single crochet, half double crochet, etc.)
- Loop choice (both loops, FLO, BLO)
- Yarn-over style (over or under, if you changed it)
- Row plan (for example: 2 rows BLO, 1 row both loops)
That little recipe is how you stop relying on memory. It's also how you start designing.
If you want projects that are perfect for practicing these techniques, our guide to crochet gifts for beginners you can actually finish is a good next step.
If your goal is to turn these textures into items people will pay for, this pairs well with how to crochet unique patterns for sale without copying.
FAQ
What Size Hook Is Best as a Crochet Needle for Beginners?
A mid-size hook is usually easier to control, especially with medium-weight yarn. Many yarn labels suggest a hook size range, and that's a good place to start. If your hands feel tense, try going up one hook size to loosen the fabric.
Should Beginners Learn BLO and FLO Right Away?
Yes, because they're simple and they teach control fast. You don't have to master them. Use them on small swatches and on edges like cuffs and brims.
Why Do My Stitches Look Uneven Even When I Count Correctly?
Uneven stitches are almost always uneven loop height or tension. Focus on lifting the loop the same amount every time, and rotate the hook instead of scooping.
If you want, grab any of our patterns from https://artncraftartncraft.art and use the worked example above as your "test swatch." Two minutes of testing saves hours of ripping out later.