
Buy Custom Crochet Patterns Online: Create Stunning Stuffed Animals
"People don't fall in love with perfect stitches, they fall in love with personality." That's the secret behind every stuffed animal that gets hugged, carried around, and "rescued" from the couch cushions. If you want that kind of magic, the fastest path is to Buy Custom Crochet Patterns Online that already have the shaping, proportions, and cute details figured out. You'll save time, avoid trial-and-error, and end up with a plush that looks like the photos.
This guide shows you how to pick the right custom crochet pattern, how to make it look professional, and how to turn it into a gift (or product) people can't stop squeezing.
Why Custom Crochet Patterns Make Stuffed Animals Look Professional
Custom crochet patterns aren't just "different," they're usually tested more, refined more, and written with clear shaping in mind. A great stuffed animal pattern tells you exactly where the belly should round out, how the head should sit on the neck, and which stitches keep the limbs firm. That's why buying a custom design often feels like skipping straight to the good part.
Most handmade plush fails in the same places, lumpy heads, floppy legs, crooked faces, and stuffing showing through. A strong custom crochet pattern usually solves those issues with smart increases, decreases, and placement guides. It also gives you better options for size changes and yarn swaps without guessing.
Here's what you're really paying for when you buy a custom pattern online:
- Better shaping instructions (so the plush holds its "character")
- Tested stitch counts (so parts actually fit together)
- Clear face placement (so eyes don't end up too high or too close)
- Details that pop (ears, snouts, paws, spikes, tails)
- Cleaner finishing (seams that disappear, fewer weird bumps)
If you enjoy the "design" part, you'll still get plenty of room to add your own twist with colors and accessories. You're just starting from a base that works.
Buy Custom Crochet Patterns Online: What to Look for Before You Click "Purchase"
Buying online is easy, but choosing the right pattern is where the win happens. The goal is a pattern that matches your skill level, your yarn, and the look you want. A cute photo isn't enough. You want proof the pattern is well written and that the finished toy matches the listing.
Start with the pattern page itself. Look for multiple photos, not just one perfect hero shot. You want front, side, back, and close-ups of the face. The description should list finished size, recommended hook, yarn weight, and whether the pattern uses safety eyes, felt, or embroidery.
Use this quick checklist before you buy:
- Check the skill level and scan for tricky steps (color changes, shaping, surface crochet)
- Confirm materials and yardage (so you don't run out mid-head)
- Look for stitch abbreviations and whether US or UK terms are used
- Read reviews for clarity and accuracy, not just "so cute!"
- See if there's support, like a message option or video links
If you're planning to sell finished plush, also read the pattern's license notes. Some designers allow small-scale sales with credit. Others don't. Respecting that keeps the handmade community strong and protects your shop.
If you want to level up fast, pair your new plush pattern with technique practice from advanced crochet pattern techniques. Strong shaping skills make every custom design look even better.
Turn a Great Pattern Into a "Wow" Stuffed Animal with Smart Materials
The same pattern can look totally different depending on yarn choice, stuffing, and finishing tools. That's why your supply decisions matter as much as the pattern itself. A simple bunny can look like a heirloom toy with the right fiber and a few pro tricks.
For most stuffed animals, tighter stitches are your best friend. They keep stuffing from peeking out and help the toy hold its shape. Many crocheters size down their hook for plush projects, even if the yarn label suggests a larger hook. You want firm fabric, not drape.
Here are materials that make an immediate difference:
- Yarn: smooth cotton for crisp stitches, acrylic for budget-friendly softness, chenille for extra plush (needs tighter tension)
- Stuffing: high-loft polyester fiberfill for bounce, or weighted pellets (inside a liner) for a "sit" pose
- Eyes: safety eyes for sturdy toys, embroidered eyes for baby-safe gifts
- Tools: stitch markers (you'll use them constantly), long doll needle, sharp scissors
Stuffing is where many plushies go wrong. Understuffing makes the toy sag. Overstuffing stretches stitches and shows white fiber. Aim for "firm but springy," especially in the neck and limbs.
If you're unsure what to buy, skim crochet supplies and materials for a 2026-friendly supply list and yarn notes.
For safety, follow guidance on child-safe toys. The U.S. Consumer Product Safety Commission shares basics around choking hazards and small parts like eyes and buttons: CPSC Toy Safety. For stuffing and general textile care, this overview from a major craft brand is a helpful starting point: Lion Brand Yarn Learning Center. You don't need to memorize everything, just use the best practices.
The Step-By-Step Build Process That Keeps Your Plush Neat and Symmetrical
A custom crochet pattern can be perfect, but the build process is what keeps everything aligned. Stuffed animals are basically sculpture, small shifts add up. If your stitches drift, your face drifts. If your decreases wobble, the head looks bumpy. A few habits fix most of it.
First, track your rounds. Most plush patterns are worked in a spiral, which means the start of round moves unless you manage it. Stitch markers are non-negotiable. Mark the first stitch of every round, and add a second marker for "center front" on the body. That little guide makes face placement so much easier.
Follow this clean build sequence for most plush projects:
- Crochet the head and embroider or place eyes before closing
- Crochet the body and test the head position before fully stuffing
- Make limbs in matching pairs, counting rounds carefully
- Pin everything in place and check symmetry from all angles
- Sew with a long needle using small, even stitches, then knot securely
After you pin the parts, step back and look at the toy like a buyer would. Is one ear higher? Do the arms match? Does the head tilt? Fixing it now is easy. Fixing it after sewing is annoying.
If you want a stuffed animal that looks store-quality, don't rush the face. Tiny changes in eye spacing can change the whole "emotion" of the plush. A slightly wider spacing often looks cuter and younger. A narrower spacing can look more serious or "anime." Test placement with pins first.
For makers who love a challenge, explore best crochet patterns for advanced projects to see how advanced design details (like shaping and texture) can level up your plush work.
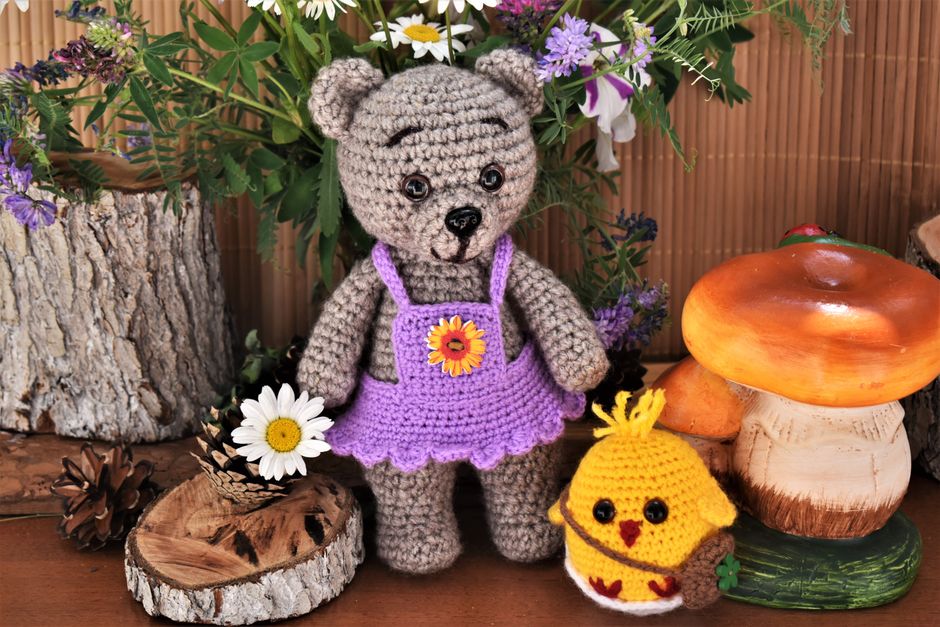
Personalize Your Stuffed Animals Without Rewriting the Whole Pattern
Customization is the fun part, and you don't have to redesign anything to make a plush feel original. If you Buy Custom Crochet Patterns Online, you can keep the structure and change the "character." Think of the pattern as the skeleton. Your yarn, colors, and extras become the personality.

Small changes usually look best because they don't break the fit of the parts. You can swap colors, add accessories, or tweak embroidery while keeping the stitch counts the same. That means the head still fits the body, and the arms still sit where they should.
Easy custom upgrades that look intentional:
- Add a tiny outfit (hoodie, dress, scarf) using simple rectangles and ribbing
- Change the face style (sleepy eyes, smile, little tooth, blush spots)
- Use textured stitches on one area (bobble belly, ribbed ears)
- Add a prop (mini heart, star, mushroom, backpack)
- Create a theme (birthday bear, graduation frog, holiday penguin)
If you're making gifts, personalization can be as simple as matching someone's favorite colors. For baby gifts, embroidered eyes and stitched-on details are often preferred. For older kids and collectors, safety eyes can look crisp and expressive.
A trend that's stayed strong into 2025 and 2026 is "cute plus comfort," plush designs that double as stress toys or desk buddies. Many makers are adding weighted pellets (secured in a fabric pouch) to help the plush sit and feel calming in your hands. If you go this route, keep weights away from small children, and always seal pellets inside an inner liner.
FAQ About Buying Custom Crochet Patterns Online
What Should I Expect After I Buy Custom Crochet Patterns Online?
Most designers deliver a digital download, usually a PDF you can save to your phone, tablet, or computer. Expect a materials list, stitch abbreviations, step-by-step rounds, and photos or diagrams for assembly. If the listing is strong, it will also include tips for yarn swaps and face placement.
If you don't see any mention of support, that's not always bad, but it can matter if you get stuck. I always recommend choosing a pattern with at least one way to contact the designer, even if you never need it.
Are Custom Crochet Patterns Worth It for Beginners?
Yes, as long as you choose a pattern written for your level. A good beginner-friendly plush pattern will explain basics like increases, invisible decreases, and how to join parts. It will also avoid super fiddly shaping and complicated colorwork.

If you're brand new, start with a simple animal body shape and minimal pieces. Once you feel confident, step up to patterns with more parts, like snouts, tails, and layered ears.
How Do I Know If a Pattern Allows Selling Finished Stuffed Animals?
Look for a "permission" or "license" section on the listing or inside the pattern. Many designers allow you to sell finished items in small amounts if you credit the designer and don't resell the pattern. Some don't allow selling at all, and that's their right.
If it isn't clear, message the designer before you sell. Keeping it transparent protects your shop and builds trust with customers.
What Yarn Is Best for Plush Stuffed Animals?
Cotton gives clean stitches and great shape, so it's amazing for detailed faces and small parts. Acrylic is soft, affordable, and easy to wash, which makes it popular for gifts. Chenille yarn looks super plush and cozy, but it can hide stitches, so it helps to use stitch markers and count carefully.
No matter what you choose, aim for tight, even stitches so the stuffing stays inside and the toy holds its form.
How Can I Make My Stuffed Animal Look More "Store-Bought"?
Focus on three things: tight tension, clean assembly, and thoughtful face placement. Use the invisible decrease (a method that reduces bumps) and sew with small stitches so seams disappear. Pin parts first, then sew, and check symmetry from every angle.
A final touch that helps is light shaping. You can add a little extra stuffing around cheeks, or gently massage stuffing into place so the head looks smooth.
Your Next Step: Pick a Pattern and Start Stitching
If your goal is a stuffed animal that looks polished, feels huggable, and gets that instant "aww," don't make it harder than it has to be. Buy Custom Crochet Patterns Online that match your skill level, then put your energy into clean stitches and fun personalization.
If you want patterns that are written clearly and designed to turn into gift-worthy plush, check out my Squarespace shop at https://artncraftartncraft.art and grab a design that fits your vibe. Then take a progress photo, because the first time your plush "comes to life" is always worth remembering.