
Best Crochet Techniques for Beginners: Make Unique Stuffed Animals
Crochet plushies are everywhere right now, and it's not just in craft circles. In 2026, more makers are selling tiny stuffed animals at local markets because they're fast, giftable, and easy to customize. If you want that same "I made this!" feeling without getting overwhelmed, these Best Crochet Techniques for Beginners will get you there. You'll learn the exact basic stitches and shaping moves that turn a flat circle into a cute bear, bunny, or dinosaur.
This guide focuses on amigurumi (small crocheted stuffed animals). You'll get clear steps, real beginner fixes, and simple ways to make your plushies look unique. No fancy tools needed, just yarn, a hook, and a few smart habits.
Why Stuffed Animals Are the Perfect Beginner Project
Stuffed animals look advanced, but most are built from the same simple building blocks. The "magic" comes from repeating basic stitches, then changing the shape a little at a time. That's why plushies are a great practice project for beginners who want results that feel impressive.
A big trend in 2025 and 2026 is personalized plushies, like mini pets, food animals, or pocket-size mascots. People love them because they're small, quick, and full of personality. The best part is that you can change the ears, colors, and faces without rewriting the whole pattern.
Here's what makes crochet stuffed animals beginner-friendly:
- Most pieces are small, so you finish faster
- Many patterns use single crochet almost the whole time
- Mistakes hide better in textured yarn and stuffing
- You can customize faces and accessories easily
If you're also thinking about gifts, plushies are a sweet option. You can pair this with ideas from How to Crochet Unique Designs for Gifts when you're ready to add custom details like initials, outfits, or themed colors.
Best Crochet Techniques for Beginners: Stitches That Build Plushies
The core of amigurumi is simple, but precision matters. Stuffed animals are usually worked in rounds, which means you crochet in a spiral and the fabric grows like a little tube or bowl. That spiral look is what gives plushies a smooth surface.

The main stitch you'll use is single crochet (sc). It makes a tight fabric, which helps keep stuffing from poking out. If you crochet loosely, that's normal at first, but plushies will look better if you tighten your tension (how tight you hold yarn and stitch size).
These are the basic stitches and moves you'll use over and over:
- Slip knot (to start yarn on the hook)
- Chain stitch (ch) (used sometimes for starting rounds)
- Single crochet (sc) (the main plushie stitch)
- Increase (inc) (two single crochets in one stitch)
- Decrease (dec) (turns two stitches into one to shape curves)
- Slip stitch (sl st) (used for joining or small details)
A strong beginner tip is to learn the "invisible decrease" for amigurumi. It makes smoother shaping and fewer bumps. You can find it explained in many pattern books, and it's a common standard in modern plushie patterns.
If you want official stitch definitions and standardized names, the Craft Yarn Council has clear descriptions you can trust: Craft Yarn Council Crochet Abbreviations.
Shaping in Rounds: Circles, Tubes, and Curves That Look Clean
Once you can single crochet, increases and decreases become your sculpting tools. Think of increases as "adding space" and decreases as "pulling space in." This is how you make a head round, a body oval, and a snout stick out.
Most plushie heads start as a flat circle. Then you stop increasing and crochet even rounds to create a bowl shape. Later, you decrease to close it. The same idea works for bodies, arms, legs, and tails. The difference is how quickly you increase and how many even rounds you do.
A clean circle is the first big milestone. It teaches you stitch counting, and counting is what keeps plushies from turning lumpy. Use a stitch marker (or a scrap of yarn) to mark the first stitch of each round so you don't lose your place.
Follow this beginner circle shape as a practice piece (single crochet in a spiral):
- Round 1: 6 sc in a magic ring (or chain 2, then 6 sc in the second chain)
- Round 2: inc in each stitch (12)
- Round 3: (1 sc, inc) repeat around (18)
- Round 4: (2 sc, inc) repeat around (24)
- Round 5: (3 sc, inc) repeat around (30)
- Round 6: (4 sc, inc) repeat around (36)
After you build the circle, crochet 3 to 6 rounds with no increases to form a bowl. Then decrease to close it. That's a head.
Now for the "unique" part. Small shaping changes create totally different animals:
- Wider head: add one more increase round
- Taller head: add more even rounds
- Pointy snout: increase slower, then do fewer even rounds
- Chubby cheeks: add two increases on the sides only
If you're curious about yarn choices and how they affect shape, check Best Yarn Types for Crocheting. Yarn texture changes the final look a lot, even with the same pattern.
Stuffing, Safety Eyes, and Finishing Details That Make Plushies Pop
Stuffing and finishing are where beginners often feel stuck. The good news is that finishing is a skill, not a talent. You can get better fast by using a few simple rules.
First, stuffing. Add stuffing in small bits, not huge chunks. Use the end of your hook or a pencil to push stuffing into corners, like the tip of a snout or the bottom of a foot. Too much stuffing can stretch stitches and make gaps. Too little stuffing makes the plushie floppy.
Second, safety eyes. If the plushie is for a baby or toddler, skip safety eyes and embroider the eyes with yarn or thread instead. Safety eyes can be a choking hazard if they come loose. Many toy safety guidelines recommend avoiding hard parts for very young kids. For general product safety info in the US, the Consumer Product Safety Commission is a solid reference: U.S. CPSC Toy Safety.
Here are beginner-friendly finishing techniques that improve the "store-bought" look:
- Use a yarn needle and weave ends in at least three directions
- Shape the face before you fully close the head (move stuffing around)
- Embroider a simple mouth with a curved line, then add a small vertical stitch
- Add blush with a tiny bit of pink embroidery thread, or a clean makeup brush and pastel
Assembly matters too. Pin pieces in place before sewing. It helps you spot if an ear is too high or an arm looks uneven.
Try this simple assembly order for most animals:
- Make head and body first, and lightly stuff both
- Place and pin eyes, then embroider face details
- Attach head to body with tight whip stitches
- Sew arms and legs, checking symmetry as you go
- Add ears, tail, horns, or wings last
A plushie's personality is usually in the face. Even tiny changes can make a big difference, like moving the eyes one stitch closer together for a "baby" look.
Quick Comparison: Beginner Plushie Styles and Which Techniques They Use
Not all stuffed animals use the same construction. Picking the right style helps you stay motivated, because you'll match the project to your current skill level. This is also where many of the Best Crochet Techniques for Beginners show up in different ways.
One-piece plushies are the easiest because you crochet the head and body together. Fewer seams means less sewing and fewer chances for parts to look crooked. Multi-piece plushies are better when you want long limbs, floppy ears, or more dramatic shapes.
Here's a simple comparison of common beginner plushie builds:
- One-piece "blob" animals (like whales or chicks): mostly increases, even rounds, and decreases
- Two-piece head and body (like bears): same shaping twice, plus one big seam
- Multi-piece classic amigurumi (like bunnies): lots of tubes for legs and arms, more assembly time
- Flat crochet plushies (like mini pillows): uses rows and simple edging, less 3D shaping
A practical beginner tip is to start with a one-piece animal, then level up to a two-piece bear, then try multi-piece. Your tension improves naturally as you repeat the same stitches.
If you want to push your design skills later, keep a bookmark on Advanced Crochet Pattern Techniques. It's a good next step once your basic shaping feels easy.
Common Beginner Problems and Simple Fixes That Actually Work
Every beginner hits the same few issues, and none of them mean you're "bad" at crochet. They just mean you need a small adjustment. Fixing these problems is part of mastering the Best Crochet Techniques for Beginners, especially for tight amigurumi fabric.

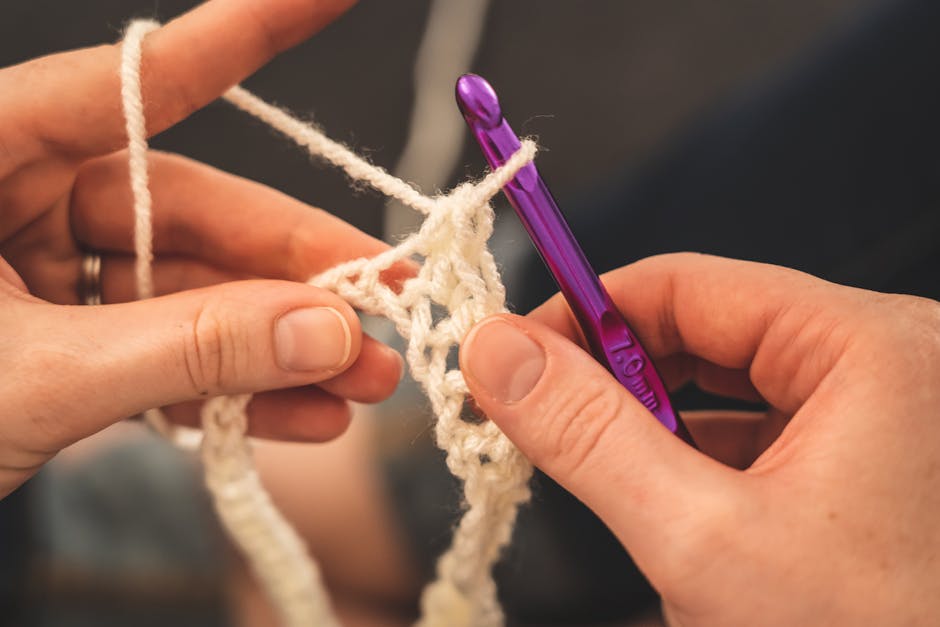
The most common issue is gaps between stitches. This usually comes from using too large a hook or crocheting with loose tension. For plushies, it's normal to go down a hook size from what the yarn label suggests. If the label says 5.0 mm, you might use 3.5 mm or 4.0 mm for a tighter fabric.
Another issue is losing count. If your round count is off, the shape twists or gets bumpy. A stitch marker fixes most of this. You can also write your round counts on a sticky note as you go.
Here are quick fixes for common problems:
- Stuffing shows through: use a smaller hook, tighter tension, or less stuffing
- Head looks lumpy: add stuffing in smaller bits and massage the shape
- Arms or legs look different: count rounds, and measure piece length before finishing
- Seams look messy: sew through both loops and pull stitches snug, but not tight
- Plushie leans sideways: reposition the head and pin before sewing
It also helps to practice one skill at a time. Make three tiny balls. Make three tiny tubes. Those "boring" practice pieces train your hands fast.
For stitch guidance that's beginner-friendly and widely trusted, the Crochet Guild of America has educational resources and standards worth browsing: Crochet Guild of America.
FAQ Mastering Basic Crochet Techniques for Stuffed Animals
What Are the Best Crochet Techniques for Beginners Who Want to Make Stuffed Animals?
Start with single crochet in the round, then learn increases and decreases. Those three skills build almost every amigurumi shape. Add a stitch marker habit early, because counting rounds is what keeps plushies smooth and even. Once those feel comfortable, learn invisible decreases for cleaner curves.
Should I Use a Magic Ring or Chain Two to Start Amigurumi?
Either works, but the magic ring usually looks neater because it closes the center hole. Many beginners prefer chain two at first because it feels simpler. If you choose chain two, pull the tail tight and stitch carefully so the center doesn't stay open.
What Yarn Is Best for Beginner Crochet Plushies?
Smooth, light-colored yarn makes it easier to see stitches. Worsted weight yarn is a common starting point because it's easy to hold and works up fast. Fuzzy yarn can look adorable, but it hides stitches, which makes counting harder. If you want more detail, visit Best Yarn Types for Crocheting and pick a yarn that matches your goal.
How Do I Make My Stuffed Animals Look Unique Without Writing a New Pattern?
Change small details that don't affect the main shape. Swap ear shapes, add a belly patch, change eye placement, or crochet tiny accessories like scarves. You can also mix colors in simple ways, like a different muzzle color or striped legs. These are fast changes that make a plushie feel original.
How Long Does It Take a Beginner to Crochet a Small Stuffed Animal?
A simple one-piece plushie can take 2 to 4 hours once you know the basics. A multi-piece bunny with four limbs might take 6 to 10 hours, mostly because of sewing and finishing. Your speed improves quickly as your hands learn the stitch rhythm.
Your Next Plushie Plan: a Simple Path From Practice to a Finished Animal
Pick one small plushie pattern and repeat it twice. The first time is for learning. The second time is for making it neat. That's the fastest way to build confidence with the Best Crochet Techniques for Beginners, because you feel the improvement right away.
Start with a basic ball body, add tiny ears, and embroider a friendly face. Keep the colors simple so you can focus on clean stitches and smooth shaping. After that, try changing one feature, like longer ears or a different snout.
If you want patterns that are designed to sell well or gift well, explore the pattern shop on my Squarespace site (artncraftartncraft.art). Grab a beginner plushie pattern, then make it your own with the customization ideas above. You'll be surprised how quickly "basic" turns into "signature style."