How to Crochet Unique Amigurumi Patterns: Tips for Complex Crochet Designs
Crocheting a "simple" amigurumi is one thing. The moment you add a turned head, a snout that actually sticks out, or a jacket with clean stripes, the whole toy can start to look lumpy fast.
If you're searching for how to crochet unique amigurumi patterns, you probably don't need another list of basic stitches. You need a way to design shapes on purpose, test them, and turn the result into a pattern that works for other people (not just you on a lucky day).
How to Crochet Unique Amigurumi Patterns Without Getting Lost
Complex amigurumi gets easier when you stop thinking in "parts" (head, body, arms) and start thinking in "forms" (ball, tube, cone, wedge). Most unique designs are just familiar forms combined with controlled shaping.
Here's a step-by-step planning method we use when we design patterns.
- Pick one "hero feature." Choose the single detail that makes your design unique, like a bent beak, a slouchy hood, or wide-set eyes.
- Sketch a silhouette, not details. Draw the outline from the side and front. You're mapping volume, not adding cute cheeks yet.
- Break it into 3D forms. Label each area as a ball, tube, cone, or flattened oval. This tells you where increases and decreases will go.
- Decide your join strategy early. Sewing, crochet-on limbs, or integrated shaping all change your stitch counts.
- Write the "math notes" before you crochet. Even a few lines like "Head max 48 sts, body max 54 sts, neck step-down 54 to 36 over 3 rnds" prevents drifting.
A small mindset shift helps a lot: uniqueness comes more from good proportions and clean transitions than from piling on tiny accessories.
A Worked Example: Designing a Tilted Head and Muzzle (Concrete Stitch Plan)
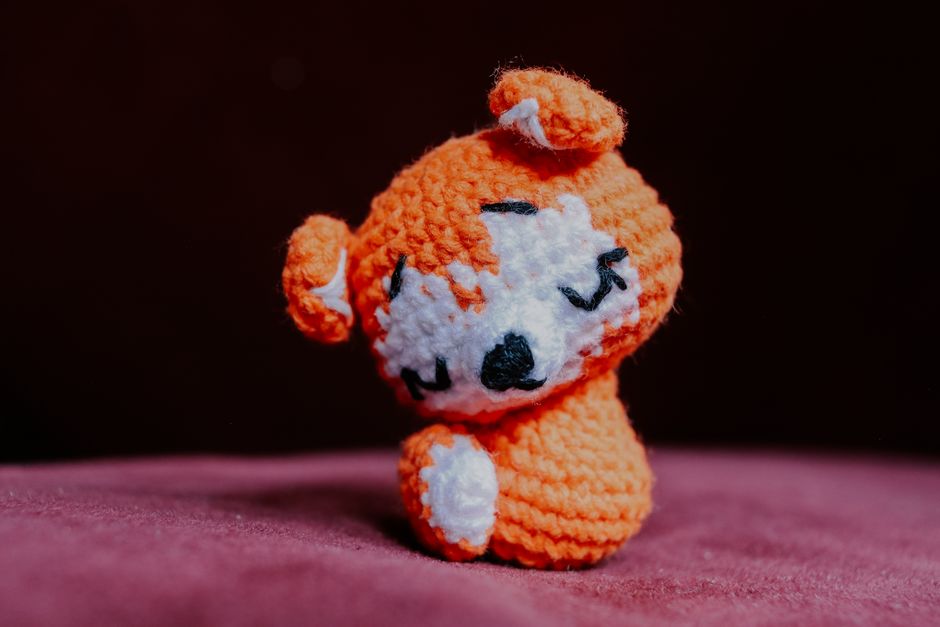
Let's design a common "hard" feature set: a character with a head that tilts forward slightly and a muzzle that stands out. This is where many toys end up looking like a potato with a bump.
Step 1: Build a Head That Tilts (Short-Row Shaping)
A perfectly round sphere sits straight. A tilted head needs extra height at the back or less height at the front.
One clean way is short rows (partial rounds) near the bottom of the head. Short rows add fabric to one side without changing the whole circumference.
Example concept (not a full pattern, just the shaping idea):
- Crochet your head as a sphere to your widest round (say, 48 stitches).
- Work a few even rounds.
- Near the lower third of the head, add 2 to 4 short-row "wedges" on the back half only.
A simple wedge looks like this:
- Crochet to the back of the head.
- Work 8 to 14 single crochet (sc), turn.
- Slip stitch (sl st) 1, sc back across, turn.
- Repeat once more, then crochet the full round again.
What this does: the back gets slightly taller, so the face angles down. Your muzzle and eyes suddenly look intentional.
Step 2: Make a Muzzle That Projects (Oval Base + Pick-Up Round)
If you start a muzzle in a magic ring, it tends to become a mini ball. That's cute, but it rarely reads as a snout.
For a projecting muzzle, start with an oval (a chain with stitches on both sides). That creates a flatter base that naturally sticks out.
Basic construction:
- Chain 5.
- Sc in 2nd chain from hook and across, 3 sc.
- 3 sc in last chain.
- Work back along the underside of the chain, 2 sc.
- 2 sc in the last open chain.
Now you have an oval. Work a few rounds around it, increasing only at the ends to lengthen it.
Then attach it in a way that avoids puckering:
- Pin the muzzle to the head.
- Pick up stitches around the muzzle edge (insert hook through both layers) and crochet a joining round.
That joining round is the difference between "sewn-on bump" and "built-in face." It also makes your pattern easier to replicate because the placement is guided by stitches, not vibes.
Transitioning from the face to the next section gets easier once you treat it like engineering. It's not about being "creative enough," it's about choosing the right structure.
Decision Framework: Choose the Right Complexity for Your Design
Not every cool idea needs the most advanced method. The trick is matching the technique to the result you want and the time you're willing to spend.
Use this framework when you're deciding how complex to go.
Choose Sewn-On Parts If You Want Maximum Control
Sewing is slower, but it's forgiving.
Pick sewn-on parts when:
- You want perfect placement (eyes, horns, arms).
- Your design has lots of small pieces.
- You're still testing proportions.
Trade-off: you'll spend more time finishing, and the toy can look "assembled" if seams are bulky.
Choose Crochet-On (Join-As-You-Go) If You Want Cleaner Shapes
Crochet-on limbs can look smoother because the stitches flow together.
Pick crochet-on parts when:
- You want strong joins for play.
- You want fewer ends to weave.
- You're comfortable keeping stitch counts consistent.
Trade-off: if you attach something slightly off, it's annoying to undo.
Choose Integrated Shaping If the Silhouette Is the Main Feature
Integrated shaping means you build the toy like a sculpture, with fewer separations.
Pick integrated shaping when:
- The design depends on a specific pose (curved spine, hunch, seated body).
- You want a "wow" shape even without accessories.
Trade-off: it's harder to write clearly as a pattern, so you'll need better notes and more testing.
If you want more technique-heavy pattern ideas, our guide to advanced crochet pattern techniques and gift-ready designs is a solid next step.
The Details That Make a Complex Amigurumi Look "Pro" (Edge Cases Included)
Big shapes get you 70 percent of the way. The remaining 30 percent is the polish that keeps complex designs from looking messy.

Yarn Choice Can Make or Break Fine Details
Highly fuzzy yarn hides stitching. That can be great for plush animals, but it can destroy small shaping like mouths, toes, or eyelids.
In our pattern work, we usually pick yarn based on the smallest detail we need to show.
- Clear facial shaping: smooth cotton or smooth acrylic.
- Soft plush look: chenille, but simplify details and use safety eyes carefully.
- Sharp color changes: yarn with tight twist and minimal fuzz.
If you're stuck here, start with how to choose crochet yarn types for cleaner stitches.
Colorwork on Small Rounds Needs Planning
Stripes and spots on a tube often "jog" (the color step shifts) because rounds spiral.
Two practical fixes:
- Use a traveling join (move the color change one stitch over occasionally) so the jog is less visible.
- For crisp stripes, use joined rounds (join with a slip stitch and chain 1). This can change texture, so test it.
Stuffing Problems: the Hidden Cause of Weird Shapes
Stuffing isn't just "more or less." It's placement.
- Overstuffing near decreases can cause bumps.
- Understuffing at corners makes dents.
- Mixed stuffing density can help, firm core with softer outer layer.
A non-obvious trick: stuff in stages. Add a little, shape with your hands, crochet a few rounds, then add more.
Pattern Writing: Make Your Uniqueness Reproducible
If you want to sell or share your design, your pattern needs to explain the "why," not only the counts.
Include:
- A short placement rule (example: "Attach muzzle centered between rnds 12 to 18").
- A pinning guide (how many stitches wide the piece should span).
- Notes for adjustments (example: "For a longer snout, add 1 even round before decreasing").
That last bullet is the difference between a pattern and a puzzle.
Test, Refine, Then Name the Pattern Like a Recipe
Complex amigurumi designs almost never work perfectly on the first try. That's normal. The win is having a testing loop that's fast and clear.
- Version 1: crochet for shape only, ignore prettiness.
- Mark what you hate immediately. Write it down right then, not after you've forgotten.
- Version 2: change one thing at a time (only head tilt, only muzzle length).
- Version 3: add details like eyelids, embroidery, clothing, or colorwork.
Naming your pieces like a recipe also helps you think clearly: "Head sphere with back wedges," "Oval muzzle with pick-up join," "Cone arms with flattened paws." Those names turn into instructions later.
If you'd rather start from a deeply tested base and customize, we also offer detailed crochet patterns for sale with clear shaping notes that you can build on.
The most unique amigurumi isn't the one with the most parts. It's the one where every part has a reason. Pick your hero feature, engineer the shape, then polish the details that show up on a shelf photo.