How to Crochet Amazing Stuffed Animals: Stunning Amigurumi You Can Sell
A stuffed animal can look "fine" in your hands, then look lumpy, floppy, or slightly haunted in photos. That's usually not because you're bad at crochet. It's because the pattern choices, yarn choice, and finishing steps weren't set up for a clean, sellable result.
This guide is our practical way to think about how to crochet amazing stuffed animals that look intentional and unique, not like the same bear everyone's seen. You'll get a simple decision framework, a worked example you can copy, and the small "pro" details that make buyers trust your work.
How to Crochet Amazing Stuffed Animals: the Make-Or-Break Choices
Most amigurumi (crocheted stuffed animals) fail in three places, shape, fabric, and face. If you make those choices on purpose, the rest is just stitch time.
Here's a comparison framework we use when we design patterns for sale.
Shape: Simple Sphere vs. Sculpted Pieces
A basic plush is built from a few round shapes. A standout plush uses shaping on purpose.
- Simple sphere body (fast, beginner-friendly): great for bees, whales, chicks, and simple bears. The silhouette is cute, but it can look generic unless the details are strong.
- Sculpted parts (more unique, more steps): separate snout, cheeks, eyelids, paw pads, or a belly panel. More sewing, but the animal reads clearly from across the room.
Choose simple shapes if you want speed and repeatability.
Choose sculpted pieces if you want a "character" look that sells on photos.
Fabric: Plush Yarn vs. Smooth Cotton
Yarn choice changes how your stitches behave and how your details show.
- Plush/chenille yarn: hides imperfections and feels luxurious, but it also hides shaping and makes tiny features hard.
- Smooth cotton or acrylic: shows every stitch and every shaping line, which is perfect for clean details and crisp faces.
A lot of sellers do best with a hybrid approach, smooth yarn for small parts (muzzle, eyelids, claws) and plush yarn for the main body.
If you want a deeper yarn breakdown for detailed toys, start with best yarn picks for advanced crochet patterns (so details stay sharp).
Face: Safety Eyes vs. Sewn Eyes
The face is the buyer's emotional decision. It's also a safety decision.
- Safety eyes: fast, consistent, and photo-friendly. They can look "mass-produced" if you don't add shaping around them.
- Sewn eyes (embroidered): slower, but you can make sleepy eyes, side glances, and soft expressions. This is also the safer choice for baby gifts.
If you sell finished plushies, be clear in your listings about whether your item is intended for children under 3. Small parts can be a choking hazard. If you need official guidance, the U.S. Consumer Product Safety Commission explains small-parts hazards here: CPSC small parts regulations overview.
Unique Pattern Dna: How to Make Your Plush Look Like Yours
"Unique patterns" usually don't mean complicated stitches. They mean recognizable design choices that repeat across your collection.
Think of your pattern like it has three layers. If you intentionally customize at least two layers, your stuffed animal stops looking like a remix.
Layer 1: Silhouette (the Outline)
Silhouette is what people recognize in one second.
- Add a big forehead for a "cute" look.
- Add long limbs for a floppy, cozy look.
- Add a wide base for a sitting plush that photographs well.
Layer 2: Feature Placement (the Cheat Code)
Where you place eyes, muzzle, and ears matters more than the exact stitches.
- Eyes lower on the face: baby-cute vibe.
- Eyes higher with a defined muzzle: more realistic animal.
- Ears slightly forward: curious expression.
A small change, like moving eyes one round lower, can change the whole character.
Layer 3: Texture and "Signature" Details
This is where your patterns become a brand.
- A repeatable belly patch shape (heart, oval, star).
- A signature snout style (flat, puffed, or pointed).
- One texture element (bobble cheeks, ribbed tummy, loop stitch mane).
If you're building a catalog, keep one signature detail consistent across several animals. Buyers love "collectable" sets.
For more ideas geared toward selling, how to crochet unique patterns for sale and price your designs smartly is a good next step.
Worked Example: a "Signature Fox" Pattern Plan You Can Sell
Instead of dumping a full pattern here, we're going to do something more useful for designers, a worked pattern plan you can adapt into multiple animals.

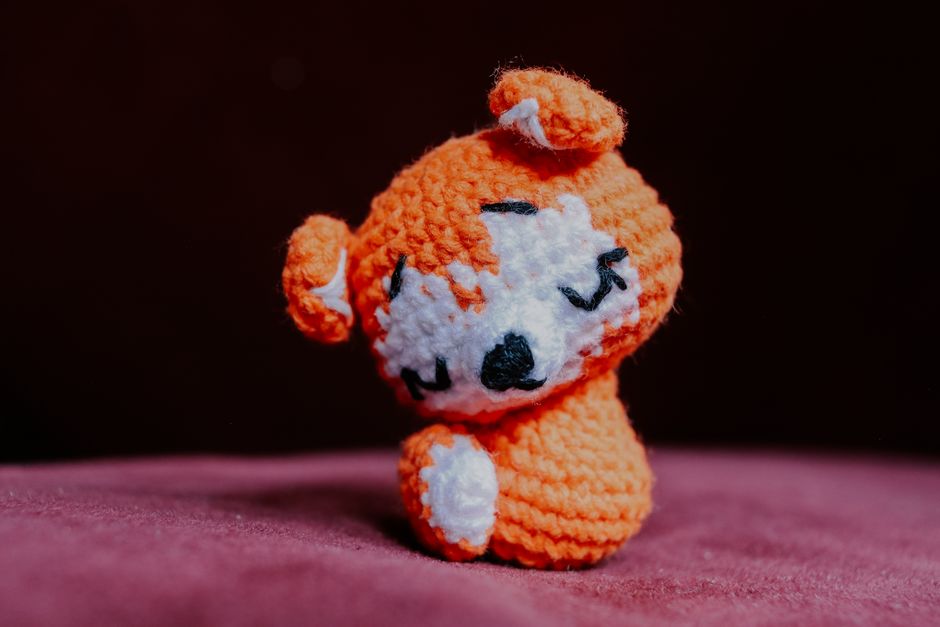
This fox is built to photograph well, stand out from common fox patterns, and be easy to size up or down.
The Design Goal (so You Don't Drift)
- Vibe: sleepy woodland fox
- Signature detail: puffed cheeks plus a tall, curved tail tip
- Construction: round head, pear-shaped body, separate muzzle and cheeks
- Yarn plan: smooth yarn for face details, soft yarn for body (optional)
The Shape Recipe (with Concrete Counts)
You can use standard single crochet (sc). The "recipe" is what makes it unique.
Head (round with flatter face):
- Start with a magic ring, increase to your widest point.
- Work 3 to 5 even rounds (no increases) to build a dome.
- Add a "face flatten" zone, do fewer increases on the front half for 2 rounds.
- Decrease evenly to close.
A concrete version for a medium plush (adjust as needed):
- 6 sc in magic ring (6)
- inc around (12)
- (sc, inc) around (18)
- (2 sc, inc) around (24)
- (3 sc, inc) around (30)
- (4 sc, inc) around (36)
- sc 12, (sc, inc) 6 times, sc 12 (42)
- sc around (42)
- sc 12, (2 sc, dec) 6 times, sc 12 (36)
- sc around (36)
- (4 sc, dec) around (30)
- (3 sc, dec) around (24)
- (2 sc, dec) around (18)
- (sc, dec) around (12)
- dec around (6)
That "front-only shaping" on rounds 11 and 13 is what gives you a cuter face that doesn't look like a perfect ball.
Body (pear shape that sits):
- Increase to a wide base, then work even rounds, then decrease to a narrower neck.
- Add weight if you want it to sit (poly pellets in a sealed pouch), but only if you know your item won't be used by small kids.
Muzzle (flat oval):
- Crochet an oval, then add 1 to 2 even rounds.
- Lightly stuff so it looks soft, not puffy.
Cheeks (your signature):
- Make two small half-spheres.
- Place them slightly below and to the outside of the muzzle.
This cheek placement is the "secret sauce." Many patterns put cheeks too low, which reads like jowls.
Face Assembly That Looks Expensive
This is where most handmade plushies lose buyers.
- Pin everything first. Use lots of pins, then take a photo. Photos show crookedness better than your eyes.
- Add eye indentations (optional, high impact). Thread a long yarn needle from the back of the head, come out at one eye point, go in at the other eye point, and return to the back. Pull gently to "sink" the eyes.
- Stitch the muzzle with small, even whip stitches. Big stitches read messy on camera.
- Embroider the nose last. A tiny triangle with a short mouth line looks clean and modern.
If you want this to become a pattern for sale, write down your exact placement rules (example, "eyes between rounds 10 and 11, 8 stitches apart"). Buyers struggle most with "where do I put the face."
Finishing, Photos, and the Real Stuff That Affects Sales
Even a perfect pattern won't sell if the plush looks uneven, stretched, or badly stuffed. These are the fixes we rely on over and over.
Stuffing: Firm Enough, Not Hard
Understuffing makes dents. Overstuffing makes gaps.
Use this quick test: squeeze the body. If you see holes between stitches, remove stuffing or go down a hook size. If it wrinkles and collapses, add a bit more.
Sewing: Hide the Seam Work
Sewing is part of the product, not an afterthought.
- Use matching yarn for seams.
- Stitch through the "bars" of stitches for cleaner joins.
- Tug seams snug, but don't pucker the fabric.
Pattern-For-Sale Reality Check
If you're selling patterns (not just plushies), your "customer experience" matters as much as your design.
- Include a materials list with hook size, yarn weight, and finished size range.
- Call out tricky parts (example, "tail is worked in joined rounds" or "ears are worked flat then seamed").
- Add at least 3 progress photos, face placement, body shaping, and assembly.
If you want to push your designs beyond the basics, advanced crochet patterns for stuffed animals with step-by-step tips is built for that next level.
Common Mistakes That Make Plush Look "Homemade" (and How to Fix Them)
These are normal problems, and they're fixable.
- The head flops forward: make the neck narrower, stuff the neck firmly, or add a small internal support (like layered felt) between head and body.
- The face looks off-center: mark the center line of the head with a removable stitch marker before placing eyes.
- Arms point in different directions: count rounds from the body's bottom to each attachment point.
- Color changes look jagged: switch yarn on the last yarn-over of the last stitch before the new color.
Your Next Best Step
Pick one animal you already crochet, then redesign it using the framework above. Change the silhouette a little, move the feature placement on purpose, and add one signature detail you can repeat across a set.
If you want patterns that already do this, that's what we make at artncraftartncraft.art, unique stuffed animal patterns with clear shaping and clean finishing built in.