
Crochet Pattern Ideas for Stuffed Animals: How to Craft Unique Designs to Sell
You finish a cute plushie, take photos, and then you notice the problem. It looks like ten other patterns already out there. You don't need "more ideas", you need a way to create crochet pattern ideas for stuffed animals that feel like yours, and that customers can't just swap for a cheaper copy.
We sell crochet patterns, and we've learned this: "unique" usually comes from a few smart design decisions, not from inventing a brand-new animal. Below is a practical, repeatable method you can use for any stuffed animal, plus a worked example you can copy and adapt.
Start with a Sellable Concept, Not a Random Animal
Most pattern makers start with "I'll make a fox" and hope uniqueness shows up later. A better starting point is a concept that creates built-in differences. Think of it like a 3-part recipe: silhouette + signature feature + finish.
Here's a quick concept framework we use when brainstorming crochet pattern ideas for stuffed animals:
- Silhouette (overall shape): chubby, lanky, big-head-small-body, long neck, tiny limbs, extra-long tail
- Signature feature (the hook): removable hoodie, oversized paws, floppy ears, star belly patch, sleepy eyes, embroidered freckles
- Finish (the vibe): woodland, pastel kawaii, spooky-cute, realistic, vintage, "baby" proportions
A concept example looks like this: "Big-head otter with tiny fins, embroidered whisker dots, and a removable scarf." That one sentence will guide every decision you make.
Pick concepts that are easy to explain in a listing title and easy to spot in a thumbnail photo. Tiny changes that vanish in photos don't help you sell.
If you want more inspiration specifically for distinct plush builds, our guide How to Crochet Unique Stuffed Toys: sell custom patterns online pairs well with the design steps below.
Use a "Uniqueness Budget": Change 3 Things That Actually Matter
Uniqueness isn't about adding more parts. It's about changing the parts that control the look. We think in a "uniqueness budget," meaning you pick three high-impact changes and do them well.

Choose 3 of these levers for each new design:
- Proportions: Change head-to-body ratio, limb length, or belly size. This is the fastest way to make a familiar animal feel new.
- Eye style and placement: Safety eyes vs embroidered eyes, wide-set vs close-set, higher vs lower on the head. Eye placement changes the whole personality.
- Muzzle/face shape: A flatter face reads "baby," a longer snout reads "realistic." You can also add cheeks with a couple of increase rounds.
- Ears and tail geometry: Long droopy ears, rounded ears, tiny ears, thick tail, flat tail, curled tail. Shape beats color for "newness."
- Surface texture: Bobbles, puffs, front-loop-only ridges, brushed yarn, faux fur yarn accents (with clear warnings, since it's harder to see stitches).
- Color blocking: Belly patch, dipped paws, ear tips, face mask. Simple areas, clean edges.
- Accessory engineering: Removable hat, tiny backpack, cape, pacifier clip-style strap (for the toy, not for a baby), or a hood with ear holes.
Keep everything else simple. If you change proportions, eye style, and tail geometry, you often don't need fancy stitch patterns at all.
Trade-Off You Should Know: "More Pieces" Isn't Always Better
Extra limbs, horns, and accessories can make a plush look premium, but they also:
- Add assembly time (buyers may blame the pattern if sewing feels hard)
- Increase places where stuffing lumps show
- Make it harder to size-grade (small, medium, large versions)
If your customers are beginners, choose 1 accessory max and keep limbs simple. If your buyers are advanced, add the clever engineering, like a removable hoodie that still sits right when the toy is posed.
Worked Example: Design a One-Page "Sleepy Bat" Pattern Concept (That Isn't Generic)
Here's a concrete example of how we'd build a unique stuffed animal pattern from scratch, without reinventing crochet.

Goal: A "sleepy bat" plush that stands out in photos and feels fun to make.
Uniqueness budget (3 levers):
- Proportions: extra-big head, tiny body
- Eye style: embroidered "sleepy crescent" eyes (no safety eyes needed)
- Ear geometry: tall ears with a slight inward curve plus contrasting inner ear
Step 1: Lock the Silhouette
- Head: classic amigurumi ball, but larger than the body (cute, readable thumbnail)
- Body: short oval with a rounded belly (stable sit)
- Wings: small, attached low on the body, with a scalloped edge
This creates "baby bat" proportions without needing complex shaping.
Step 2: Plan Shaping Before You Crochet
Write your shaping notes in plain language first:
- "Head is widest around rounds 7 to 12, then closes fast so it looks chubby."
- "Muzzle is optional, but if included it should be a small oval that sits low."
- "Ears are tall triangles, then you pinch the base slightly so they tilt inward."
That last line is a differentiator. Tilted ears change the expression a lot.
Step 3: Make 2 Prototype Decisions That Reduce Support Emails Later
- Embroidery plan: Mark eye placement with pins before stitching. Write the instruction as "place eyes between rounds X and Y, about Z stitches apart," plus a sentence about adjusting for your tension.
- Wing attachment plan: Attach wings after stuffing, and pin first so they sit even. Include a note that wings can be sewn flatter (cuddly) or angled (posed).
Step 4: Add One "Signature" Detail
Give the bat a tiny crescent belly patch (simple color change or sewn-on felt circle crocheted in yarn). This is easy, photo-visible, and brandable.
Step 5: Name It Like a Product
Instead of "Bat Amigurumi," call it "Sleepy Crescent Bat." Customers remember that.
That's a unique pattern direction with beginner-friendly construction. It's not complicated, it's intentional.
If you want more profit-focused design angles, this pairs well with stuffed toy designs that stand out and sell.
Test, Write, and List Your Pattern Like a Seller (Not Just a Maker)
A pattern that sells is clear, predictable, and easy to trust. You can be wildly creative, but you still need a clean pattern experience.
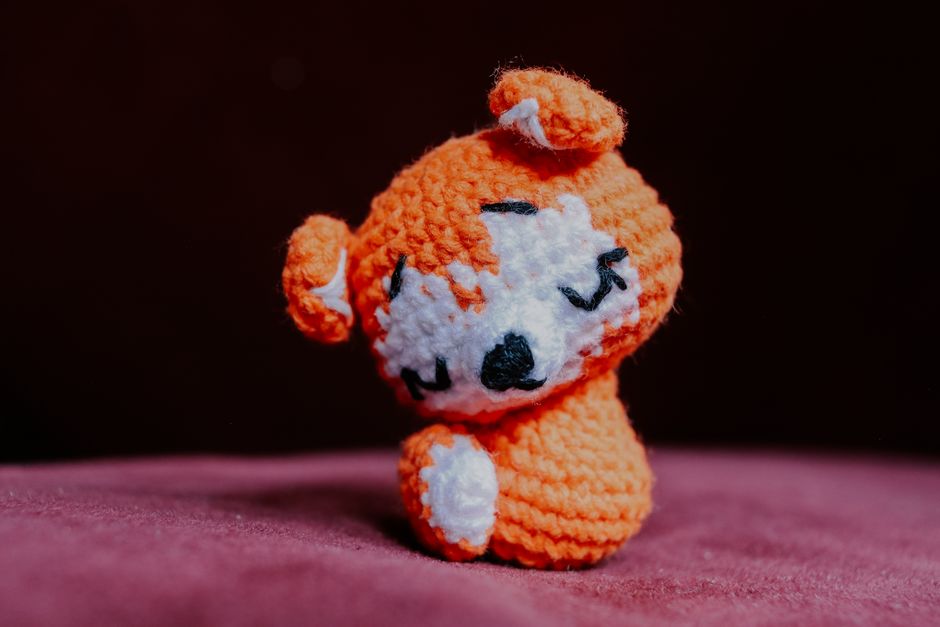
Pattern Testing: What to Test (and What People Forget)
Test for more than "it works." Test for "a stranger can follow it."
- Yarn swaps: Try the same pattern in two yarn weights (like worsted and plush). Note what changes, such as hook size and eye placement.
- Stuffing behavior: Overstuffing can stretch stitches and distort faces. Add a sentence telling buyers to stuff firmly, then stop before stitches widen.
- Sewing order: Many buyers struggle with symmetry. Give an order, like "ears first, then muzzle, then arms."
- Round counting clarity: Use consistent formatting, and repeat key counts. "(18)" at the end of each round saves mistakes.
If you include safety eyes, add a clear reminder: install them before closing the head. Also remind buyers that safety eyes are not safe for babies or pets who chew. Every buyer makes their own safety choices, but your pattern should still include the common caution.
Pricing and Product Format: a Simple Decision Framework
Pricing depends on your audience and complexity, but this framework keeps you sane:
- Choose a lower price if it's one main piece, minimal sewing, and the toy looks similar to common basics.
- Choose a higher price if it includes size options, accessories, multiple face variations, or advanced techniques (like shaping with short rows, or complex colorwork).
If you're offering advanced construction, say so directly in the listing. People who want a challenge will buy it faster.
Listing Tips That Actually Move Sales
- Lead with the differentiator: "Sleepy eyes + scalloped wings + crescent belly."
- Show scale: one photo in a hand, or next to a common object.
- Include skill level, stitch abbreviations used, and finished size range.
- Add 1 to 2 photos of the plush from the side and back. Buyers look for clean shaping.
Also, take one process photo (pinned pieces before sewing). It quietly signals that your pattern is well-built.
FAQ
How Do I Make Sure My Stuffed Animal Pattern Is "Original Enough" to Sell?
Focus on creating your own written instructions, your own photos, and your own combination of design choices. Avoid copying another pattern's exact shaping, piece layout, or distinctive details. If your plush would be mistaken for a specific existing design, change your three big levers (proportions, face, and one signature feature) and prototype again.
What's the Fastest Way to Create New Crochet Pattern Ideas for Stuffed Animals Without Burning Out?
Build a "base body library" with 2 to 3 bodies you love (chubby, tall, sitting). Then create new heads, ears, tails, and accessories that fit those bodies. You get variety without rewriting everything from zero.
Should I Design for Plush Yarn or Smooth Yarn?
Smooth yarn shows stitches clearly and is easier for most buyers to follow. Plush yarn photographs well and feels cuddly, but it hides stitch definition and can frustrate newer crocheters. A good middle path is to design in smooth yarn, then add plush yarn notes as an optional variation.
How Many Testers Do I Need?
One good tester can catch major issues, but multiple testers catch different tension (how tight someone crochets) and different reading styles. If you can, test with at least one crocheter who doesn't crochet like you.
If you want, tell us the animal you're designing, the yarn type (cotton, acrylic, plush), and the skill level you want to aim for. We'll suggest three "uniqueness budget" combos and a signature detail that will show up in photos.